 |
Volume II, No. 1, Fall 1974 |
A VISIT WITH DOROTHY AND CHARLIE
When we first arrived at the home of the McMicken's, Charlie came out and greeted us at the car, welcoming us in. Dorothy met us at the door with a warm smile. We felt comfortable and at ease in their home in the friendly atmosphere around us.
They love the Ozarks and are preserving a part of it in their own way by using its natural beauty in their handicrafts and relishing the Ozark culture in their historical interests.
Charlie told us, "I retired when I was sixty-two. We've never been sorry. They've been the best years of my life." Because of their many interests neither are bored. Proud of his work and equally proud that we admired Dorothy's work, Charlie showed us their hobbies.
They are not as physically active as they once were when they farmed full-time, and spent spare time square dancing and hunting Indian artifacts. But Charlie still searches everywhere he gets a lead for more barbed wire to add to his collection of 800 kinds, and he still enjoys calling square dances though neither he nor Dorothy dance anymore. Poor health has not lessened their interest in doing thing. Now many of their activities are closer to home in Dorothy's rose garden, Charlie's shop, and inside with their arts and craft projects.

Charlie and Dorothy McMicken with their dog Pete. They've had Pete for about eight years. Around Christmas time last year, Charlie taught Pete a few tricks like jumping over a stick, walking on his hind feet, and more. Therefore, Charlie told us, "You can teach an old dog new tricks."
| The kiss of the sun for pardon, The song of the birds for mirth. One is nearer God's heart, In a garden than anyplace else on earth. |
Dorothy has this verse on a sign by their driveway, in her beautiful rose garden. Even though she has many interests, she finds time to take care of her over 100 different types of roses.
[17]
Dorothy carefully explained each step in making the devil's claw bird.
DEVIL'S CLAW BIRDS
Appealing to us right away was Dorothy's ornamental birds made of devil's claw. Devil's claw, a common name for the unicorn plant, is a native plant of southern United States. Its sticky, seed pod with a curved horn is what makes this plant unusual. The thick body of the three to four inch pod ends in a curved horn the same length. When dry this horn splits into two sharp claws as shown in photo #3. While hunting for some seeds to plant, one cut Dorothy enough that she began to bleed.
We asked Dorothy if she knew where the name came from. She said, "This woman told me the reason why they called it devil's claw. These plants evidently grew wild because the cows came in with those pods in their tails, and when the cow switched her tail, why of course she'd hook those claws in you where ever they hit. They would hurt."
Dorothy grows these unicorn plants in her garden. Though she bought the first seeds she had, she now keeps seeds to plant each year. She plants only a short row in her garden but every branch of the plants bears a cluster of pods on them. The small black seeds found in the long oval part of the pod need to be planted the very last of April or the first of May. Dorothy advised us to plant three seeds just to make sure a plant comes up.
The outer dark skin of the pod sheds before it ripens in the latter part of the growing season. You need to pick them before the first frost, because the frost will kill them.
To prepare the devil's claw before making the bird you may want to bleach it in weakened bleach water for about an hour or so if you prefer a lighter beige color. Dorothy thinks this makes prettier ornaments than the natural black.
To make the birds first put the legs in. Dorothy uses a horse shoe nail to punch the holes, because the outer skin of the claw is very tough. Stick in round toothpicks for the legs. The curved claws and legs will be enough support for the bird to stand.
Next put the head on the stem end. Glue, stick it on or fasten it according to what you use. There are many things you can use for the head and you can really use your imagination. Some of the things Dorothy uses are hemlock cones, pop beads, caster beans and tiny gourds. She would much rather find something for the head that has a natural beak if she can find it, like the shaft of a pop bead. If she can't find something that works, she glues on a wild milk pod. For the eyes she uses sequins or draws on an eye. For extra decoration Dorothy sticks feathers in the tail and sometimes in the head. In photo #4 she used a caster bean head with sequin eyes and made the streamers of feathers.
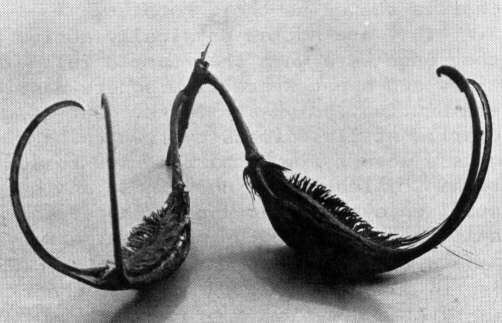
Photo #3 - The devil's claw right after being picked.
[18]
The birds can be made to stand up on their own legs or be fastened to a base. In photo #5 Dorothy has used a base made of a varnished wild grape vine. Drill a tiny hole into the wood and in the bird and join with a small toothpick. The smaller bird in the picture has a pop bead for its head and the larger a hemlock cone.
Sometimes you find pods with a shape. Dorothy calls the birds in photo #6, "Love Birds." She took advantage of the way the two grew together. All she did after she bleached them was to attach them to a piece of wood, adding a shell in the center for interest.
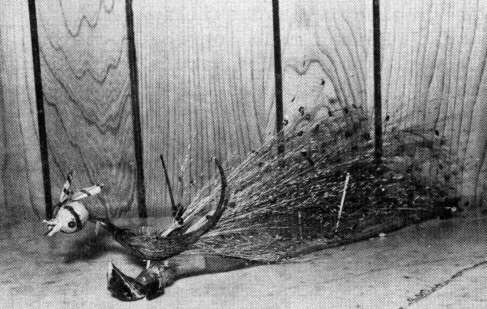
In photo #7 Dorothy has used a painted gourd for the head and a wild milk pod for the beak. To add to the beauty of the bird, she made the tail feathers of dried grass, gluing sequins on. She then attached the peacock to a base made of a varnished stick.
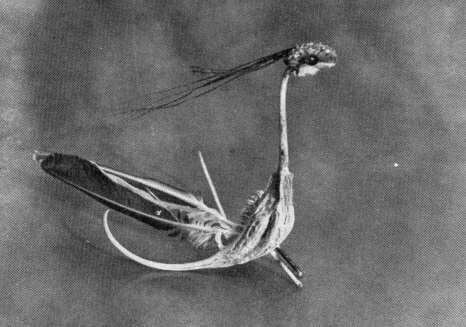
Photo # 4 - This ornament stands alone with legs made of toothpicks.
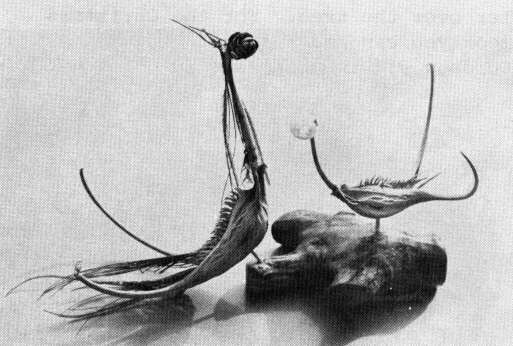
Photo # 5 - These birds stand on a base of wild grape vine.
 |
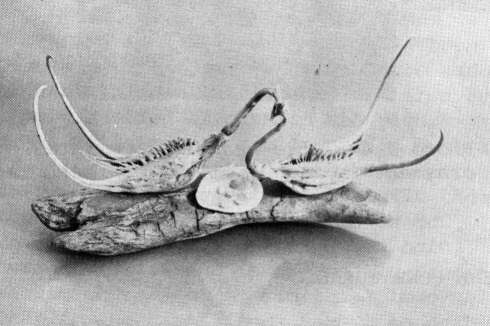 |
Photo # 7 (left) Dorothy uses milk weed pod for beak, gourd for head and dried grass for the tail to make a more elaborate ornament in contrast to the one in photo # 6 (right) where she uses the natural growth formation for her "Love Birds."
FEATHER TREES
For beautiful Christmas decorations Dorothy makes feather trees. Materials needed to make these trees are a piece of styrofoam cut in a cone shape the size you want the tree, a flat piece of Styrofoam for the base and a great many soft turkey feathers to make the tree full and fluffy.
Fasten the body of the tree to the base with a stick or dowel pin. Then stick the quill end of the feathers in the styrofoam. They will stay in the position you put them. Arrange them close together with the feather tips curving up to represent limbs of a tree. Then spray the feathers with a plastic spray so they will stay securely in place. For extra beauty, dye the feathers different colors and sprinkle glitter over the tree. For the Christmas look you can add a star to the top as Dorothy did in photo #8.
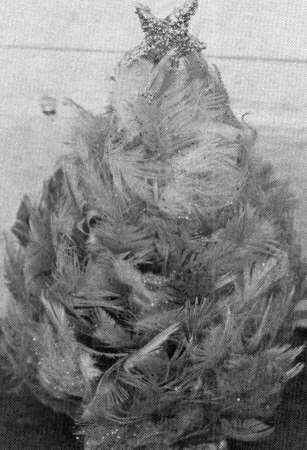
Photo # 8 - This beautiful Christmas ornament is made from turkey feathers
PINECONE TURKEYS
Another decorative item Dorothy makes is pine cone turkeys which can be used around Thanksgiving time. You need a fairly good sized pine cone, pipe cleaners and paper cups used for candy.
To make the neck and head, shape a single pipe cleaner the way you want it and glue a bead on for the eye. Then stick it into the cone. Making the feet is the hardest part because you cut a pipe cleaner into three small pieces for the toes. Wrap the ends together with wire. Then wire the three smaller pieces in a longer one for the leg and stick it firmly into the pine cone. To represent the feathers of the turkey you can use the paper cups that come in boxes of chocolates. Fold them in half and insert in the cone. These make cute favors or decorations for Thanksgiving and Christmas season as shown in photo #9.
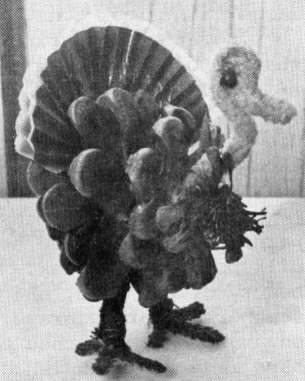
Photo # 9 Pine cone turkeys can be used for decoration around Thanksgiving time.
ROCKS POLISHED BY NATURE
After admiring Dorothy's original handicrafts we noticed that Charlie also was imaginative and skillful with his hands. He has made intricate designs and plaques using little naturally polished rocks. He told us the history of these unusual rocks.
"Rocks to be polished are put in what is called a tumbler with some water added and a hard abrasive, something harder than the rocks. Then they're turned with a motor continuously, constantly, day and night and night and day perhaps for weeks. This is to put the polish on." Charlie handed us a few perfectly smooth, satiny, shiny rocks.
[20]
"But these rocks were polished in a different way. A geologist told us that there once was a cave in Pulaski county where I find these rocks. In the cave were rocks, red clay dirt and water. The water had enough force so it tumbled the rocks into the red clay dirt, and the dirt which is much softer than the rock is the thing that polished the rocks. It would take thousands, maybe millions of years to polish rocks with a soft abrasive like clay dirt.
"Further the geologist told us this place was right close to a river which cut the cave in two. When that happened, rocks and dirt spewed out of the hole the river had created. The rocks and the clay dirt are there now and you can go pick the rocks up. That happened tremendous years ago, because the river now is twenty-five to thirty feet lower than where these rocks can be picked up. Some of the rocks are highly polished. Probably there's nowhere in the world where a thing like this has happened in exactly that way. It's something unique."
Charlie goes down to the area and brings back buckets of rocks and dirt. He then pours the rocks out on a screen to separate the rocks from the dirt. He looks at the rocks and sorts the ones that he wants to use by size and shape. It's better to get the rocks that have the same shape or size together for one plaque.
For the background of the plaque, he likes rich, red velvet, even though it is crawly and sometimes hard to glue the rocks to it.
First make the design you want for the plaque. Charlie makes geometric designs and often spells out phrases as in photo #10. Then start laying down rocks to fill in the pattern. It is very tedious, nerve racking work, trying to get the rocks to fit just right. You might have to try several times before finding the right rock.
After arranging the rocks where you want them, glue them in place and let dry. You can then frame it for a wall plaque. These rocks are very beautiful and reflect light in many colors.
We are constantly being inspired by the wonderful people we meet while working on BITTERSWEET, learning as much from their example as from the skills we want to learn. As so many of our friends, the McMickens have taught us more than handicrafts and square dancing. As we left his house Charlie said, "I cannot possibly or Dorothy cannot possibly live long enough to do all the things we wish to do."
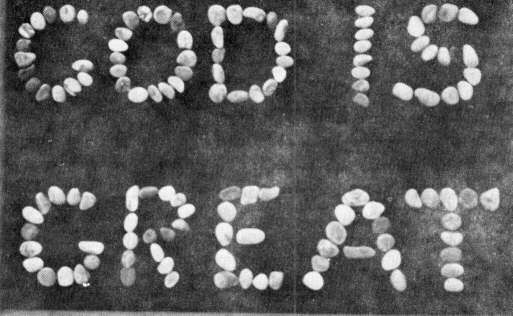
Photo #10 - A plaque made by Charlie using his naturally polished rocks.
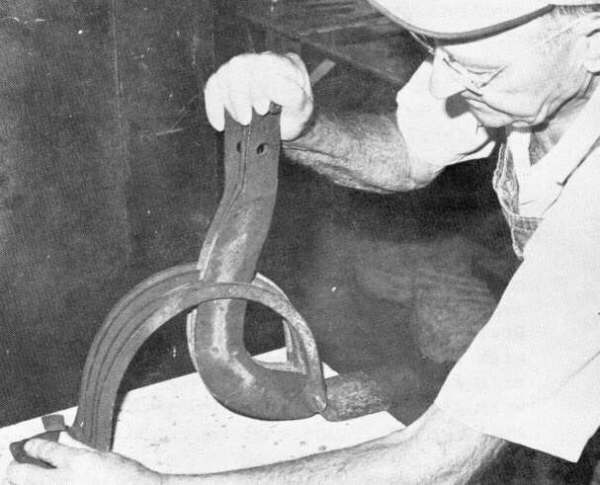
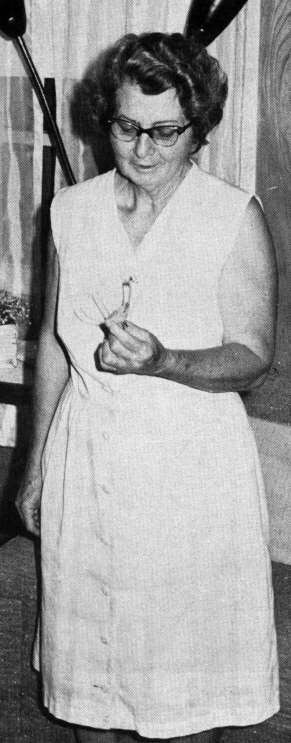
Charlie has this tool he had been unable to identify. Thought to be made around 1900, it was forged from iron by a very skilled blacksmith who paid great attention to small details such as the wing tipped nuts on the ends of the bolts. Charlie said when he pulls them toward him that the three blades cut something into four parts. The bolt near his left hand is apparently used to secure the object to something immovable. Charlie and his friends have been unable to find anyone who can identify this tool. We would be grateful to any BITTERSWEET reader who knows what it is if he would write and tell us.
[21]
Copyright © 1981 BITTERSWEET, INC.
Next Article | Table of Contents | Other Issues
