 |
Volume I, No. 3, Spring 1974 |
SORGHUM MOLASSES
BITTERSWEET STYLE
A hundred years ago if you did not have a few jugs of molasses you were in for a sweetless winter. Sorghum molasses brought the main sweet, sugary taste to cooking. When the crop did not turn out, the Ozark people were in for bitter gooseberry pie or had to be content with just butter on biscuits and cornbread. Sugar was an expensive and difficult to get luxury, and finding a bee tree too unreliable. Farmers could be more self-sufficient with something they grew and made themselves, like the nearly always dependable sorghum cane crop.
However, not everyone that endeavored to make molasses was satisfied. The molasses might be green from not enough cooking, or it might be cooked too fast. It could be murky from dirty stalks or from improperly strained juice, or black from being scorched. It might be bitter from the cane being frosted on or from improper handling of the harvesting. Or a poor growing season could produce an inferior crop. So it was very important to know what to do while growing, harvesting and cooking the sorghum cane. The making of good molasses was a skill not every one had. Those who made it well were sought after.
Very few people had their own mills even years ago, usually one in a neighborhood. As sugar became more available, the number of mills became more scarce as time went on until now very few in the Ozarks are in production.
The decline in molasses use was partly because sugar became readily available and cheap. Sugar allowed women to make finer cakes, jellies and other foods. But on Ozark tables sugar did not completely take the place of molasses which continued to be in demand as long as it was available. The staff of BITTERSWEET, under the watchful eyes of Elva and Myrtle Hough, raised a cane crop and went through all the processes of making molasses. From our experience and talking with people who used to make molasses, we believe the main reason for its scarcity today is the tremendous amount of hand labor involved. Most people are not willing to work as hard as is required to make molasses, and those who are willing cannot get the labor to help them. For molasses making requires a fairly big crew.
Back when people depended on molasses, they could obtain it in several ways even if they did not have a mill themselves. If they had the money, they could buy their year's supply in the fall from mill owners or the general stores that always carried it. They could raise their own cane, cut, strip and top it and haul it to the mill. The mill operator would custom grind the juice and make the molasses for a share of the product, or for pay. Sometimes the owner of the mill would move it to the cane patch to custom make the molasses right on the farm.
[19]
Power to operate the mills was furnished by either mules or horses in the early days. Even after gas engines or tractors were common, it was cheaper and just as efficient for many to use their horsepower as before. The animals were harnessed to a pole that turned the mill to extract the juice from cane. When tractors came into general use, pulleys could be attached to engines to turn the belt, giving the same results. The difference in sources of power, however, did not change the taste of molasses.
The size of the patches of cane would depend on how much molasses was needed. Men usually planted enough for just their family, a small patch which would produce ten to twelve gallons, enough for one year.
Harvest time in late September and early October was indeed a time of mouth watering, getting to suck on the cane stalks and eating all the good things that could be cooked from molasses. For the parents it meant lots of labor before the job was over.
The finished product of molasses was often stored in stone crock jugs. These would keep the molasses well through the winter months. By spring the liquid might turn to sugar, but all that needed be done was to get the jug out of the cellar and put it on the back of the wood stove to heat up. The molasses would pour as well as before.
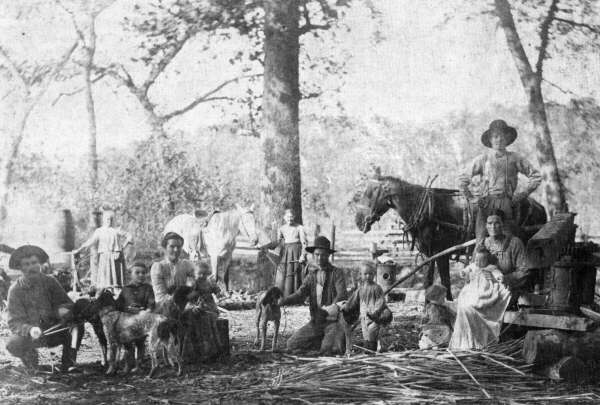
Near Bennett Springs, Missouri, four generations of Smiths in 1905 made molasses--a family tradition carried on by Charley Smith (right) until a few years ago. Photo courtesy of his granddaughter, Janelle Smith.
[20]
Besides being a table spread, molasses was used in gingerbread, cookies and cakes, to sweeten pumpkin pie and spicewood tea, to make popcorn balls and taffy and in many other foods. As some older Ozarkians would say, "Them molasses make baked foods taste better. Just put a gullup in to flavor." This humorous term for a measurement is somewhat hard to explain because it is a word to describe the sound that the thick molasses makes when being poured out of a jug. What comes out between the two sounds was a gullup. (See page 12) for recipes using molasses.)
When molasses mills were common, you could buy molasses for seventy-five cents to a dollar a gallon. Now days you rarely, even in the Ozarks, are able to buy homemade molasses for any amount of money. Only with the hard work of families and neighbors gathering to help one another was the joy of having sorghum molasses for the winter made possible.
PLANTING
Work for making molasses begins in May when the BB-sized sorghum molasses cane seeds are drilled into rows to begin the process. Cultivation of the ground begins a few weeks later to remove weeds growing between the rows and to loosen up the ground around the plants. In the early days man used a horse to break the ground, lay off the rows and cultivate (plow). Now the planting and plowing are done with power machinery, but even today with all the machines man has, he must do almost all the rest of the work himself as the hard work of making molasses begins.
THINNING
Cane seed is too small to be planted spaced apart like corn. Even with careful hand planting or with drills stopped down as much as possible, more seed is planted than needed. Therefore, the rows of young plants must be thinned when they reach knee height to one plant every six to eight inches. Thinning is done with a broad hoe. Sometimes it is necessary to pull out by hand the excess plants around the one to be left. (see diagram # 1)
When cane reaches knee height it must be thinned by hand. Robert Mckenzie uses a broad hoe.
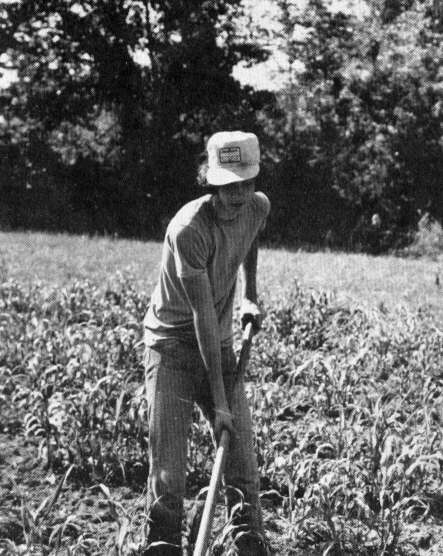
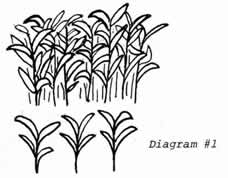
Diagram #1
[21]
It is important to dig or pull up the plants by the roots so they will not sucker out, causing four or five new weak plants to grow where one was cut off. Thinning gives the remaining plants room to grow tall and develop thick stalks. If improperly thinned, the resulting cane will be a thick row of underdeveloped stalks. Small stalks cut down on the juice production besides making the harvesting much harder.
HARVESTING
You can tell when the cane plants reach maturity in late September or early October by looking at the seed tassels which change in color from green to medium brown.
Harvesting begins with stripping, or removing the leaves. Debris from the leaves if run through the mill would make the molasses bitter. The leaves need to be stripped before the first big frost to prevent damaging the juice in the stalk. If there is danger of frost, plants can be stripped and left in the field until ready for cutting.
To strip you can use two sticks about thirty inches long, bringing them down on each side of the stalk to knock the leaves off. By this time the leaves are dry and break off easily. Some molasses makers especially skilled in stripping can give the heads one blow and knock off all the leaves. Leaves are sometimes stripped by hand after the cane is cut and hauled to the mill. Either way is tedious work..(see diagram # 2)
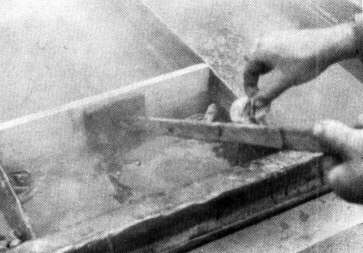
Topping the plants is next. The seed tassels must be cut off to keep the seeds out of the juice. Cutting off the heads is done with either a corn knife, a sharp hand sickle or butcher knife. (see diagram # 3) The heads that are cut off and left in the field make excellent feed for wildlife or for stock that may later be turned in to the field. If the cane is cut in the field before topping, the heads can be cut off several at a time and saved for seed or feeding.
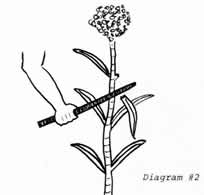
Diagram #2
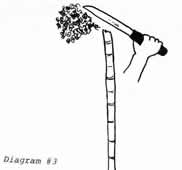
Diagram #3
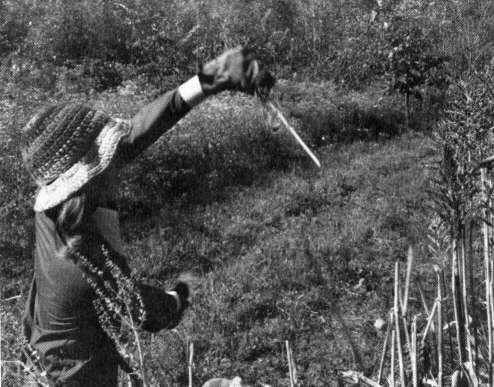
A quick slice with a sharp knife removes the heads.
[22]
The last step in harvesting is cutting the cane stalk itself to be hauled to the mill. The stalks should be cut as close to the ground as possible without getting into the dirt. This is important since dirt on the Stalk will get into the juice. Since the larger lower end of the stalk contains much of the juice, you should get as much of the stalk as possible. After cutting, without hurting its quality, the stalks can be stored for up to two weeks before extracting the juice.
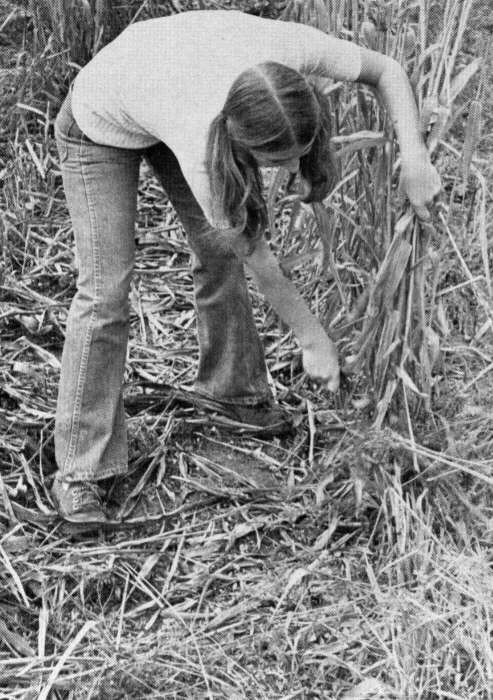
Cut the stalks close to the ground, the last step before hauling to the mill.
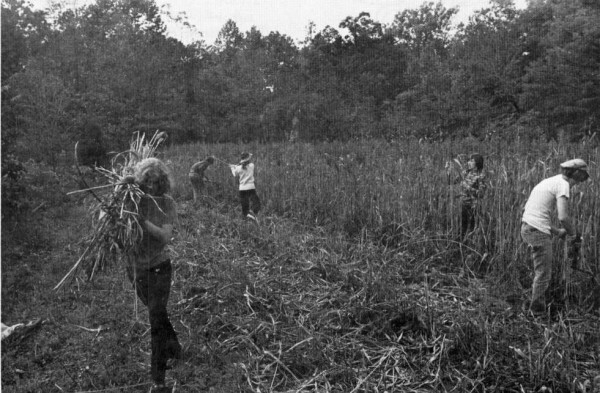
Cutting, topping, stripping and loading. Much hand labor is involved in harvesting cane.
[23]

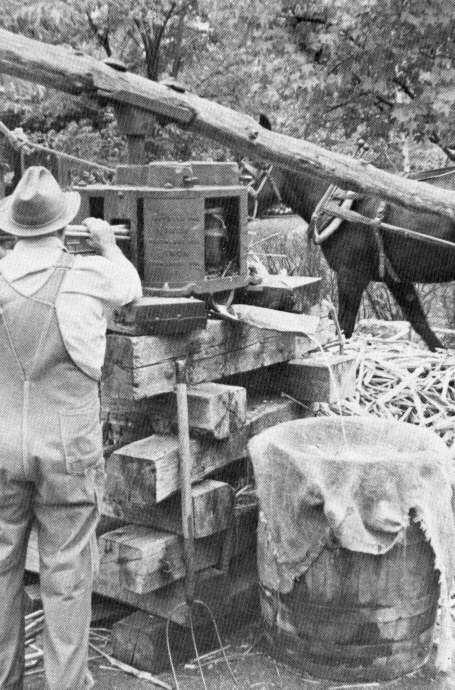
Diagram # 4. Before engines came into use a horse harnessed to a pole was used to turn the rollers in the mill.
EXTRACTING THE JUICE
The mill is the first place where you get a look at what will soon be molasses. Before tractors, horses were used to turn the rollers in the mill. A horse or mule harnessed to a pole walked in circles. The pole was attached to gears which turned the rollers of the mill. The animal was usually trained to start and stop on verbal commands, keeping a slow, steady walk around and around. If not well trained, someone had to lead it around to keep it from tearing up the mill or possibly hurting someone. (see diagram # 4)
This method of power was used entirely in the Ozarks until recent years when tractors replaced most of the draft animals. The tractor power take-off throttled down to a slow rpm is hooked up by belt to a wheel, which turns the rollers. This method is more dangerous since it would be impossible to reach the motor in time to stop the rollers if someone caught a hand or arm in the mill, where a verbal "whoa," would stop the horse.
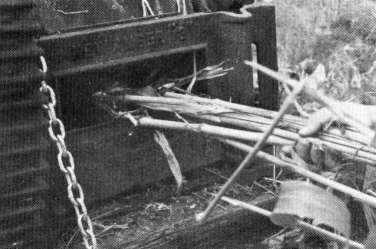
Rollers squeeze the juice out of the cane as it is fed into the mill.
[24]
The cane stalks are inserted into one side of the mill. The rollers crush the stalks, squeezing out the juice very much like a wringer on a washing machine. The juice flows off the rollers into a metal trough leading to the collection bucket or barrel. Over the bucket are several thicknesses of cheesecloth to filter out any pieces of stalk or seeds that may have dropped down with the juice.
The stalks flattened by the three rollers go on through the mill and come out on the other side as plummies. These plummies can then be used as feed or compost. (see diagram # 5)
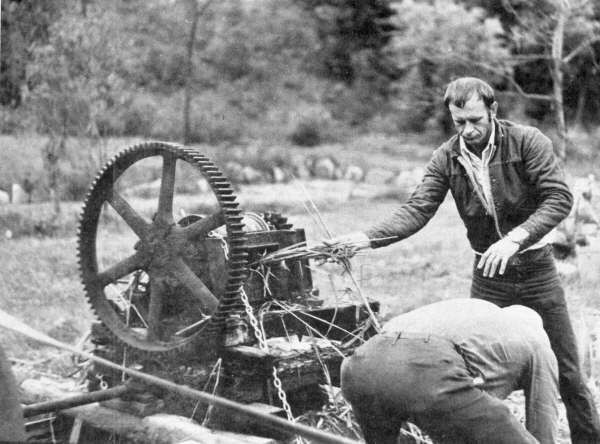
Caution must be used while feeding cane into the mills since it cannot be stopped in time.
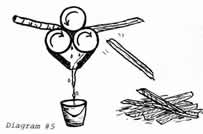
Diagram #5
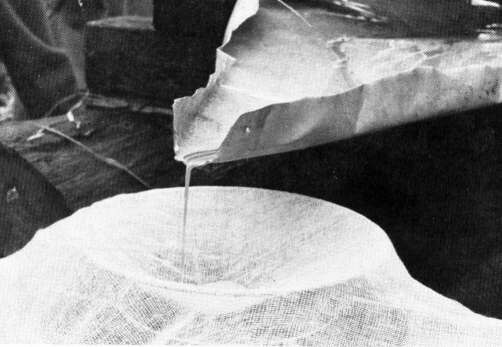
After going through the mill the cane juice is filtered through cheesecloth before being taken to the pan for boiling.
[25]
COOKING
The raw greenish looking juice is still a long way from finished molasses. Even before beginning the hours of cooking in the big open vat, you need to do considerable preparation getting the vat ready for this next operation.
A foundation of rocks is built about three feet high, or a comfortable working height, and as long and wide as the vat. Concrete blocks or bricks can be substituted for rock. A flue is built at one end. The other end has an opening to add wood to the fire and for a draft. Permanently built foundations have doors and regular stove drafts built in, but a temporary structure can be devised with asbestos or other non-flamable material to control the air intake on the open end. The foundation should be built with the end section where the molasses comes out a few inches lower than the first section.
The fire can now be laid. It should be evenly laid the entire length of the vat. Most Ozark sorghum molasses makers used wood for fuel because of its availability. During the entire cooking process the fire must be tended and controlled to keep an even and hot heat.
The pans or vats are made of copper or steel and usually are divided into five sections with holes or other opening for the juice to be transferred from section to section during the cooking process. (see diagram # 6) In some vats the sections are further divided off into three more segments. (see diagram # 7) The divisions are so that the cooking of the molasses can be a continual process. As the molasses cooks, it is moved down the pan with fresh juice continually being added in the first section. Some vats are not divided at all. This means cooking just one batch at a time until done.
The juice can be stored a few days before boiling, but usually molasses making for a family was a one or two day job. The cooking would begin as soon as there was enough juice extracted for one section, with the mill running and molasses cooking in several stages all at once.
When the foundation is laid and the wood in ready for the fire, set the vat on the foundation, stop up any cracks or holes the heat might escape from and you are ready for the cooking process.
Cooking the juice begins by filling the pan with water to protect it until the fire reaches a temperature hot enough to keep it boiling. When the water comes to a boil, you are ready to remove the water from the first section and pour in the first batch of juice.
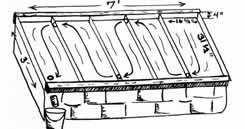
Diagram #6
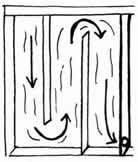
Diagram # 7
[26]
As the first batch of molasses boils well, it is moved to the next section. The first section is replenished with fresh juice. Section by section the batches are moved slowly down the pan each being cooked more and more until reaching the last section. There before you, in the five sections you can see the color change from a sickening opaque green to a rich medium golden brown just slightly darker than honey. The consistency changes from thin watery juice to thick syrupy molasses.
The juice in each of the sections boils, reaching a desired stage before being moved on. You can even see a difference in the way the liquid boils in the five different sections, changing from a rapid foamy boil to the slow blurp of the thickened molasses.
To move the juice from one section to another use a long-handled wooden pusher built just the width of one section of the vat. (see diagram # 8) Put a clean doubled cloth under the pusher at the end opposite from the hole. Lay the pusher on the cloth. Slowly push the juice up the section toward the hole.
The holes are stopped with clean rags. Remove the rags to allow the juice to flow into the next section. When all the juice has been transferred and before you remove the pusher, stop up the hole with the rag to keep the juice from returning.
In a like manner the juice in each section is moved forward, new fresh juice being added to the beginning to keep a continued cooking process. Finished molasses comes out of the last section and raw juice is added to the first all day long and sometimes into the night and next day until all the juice is cooked.
When cooking the juice, keep it stirred and remove the skimmings. The pusher makes a good tool to stir. Stirring is especially needed in the last two sections to prevent scorching. The skimmings, or impurities, boil to the top like scum when making jelly. These must be removed from the first three sections for a clear product. Remove these with a long-handled skimmer, a flat-bottomed scoop-shaped metal strainer with holes in the bottom. (see diagram # 9) Just skim the bubbling surface of the juice, collecting the skimmings. The good juice will escape through the holes back to the vat. The skimmer, dunked in a bucket of water after each skimming, is ready to use again.
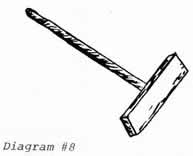
Diagram #8
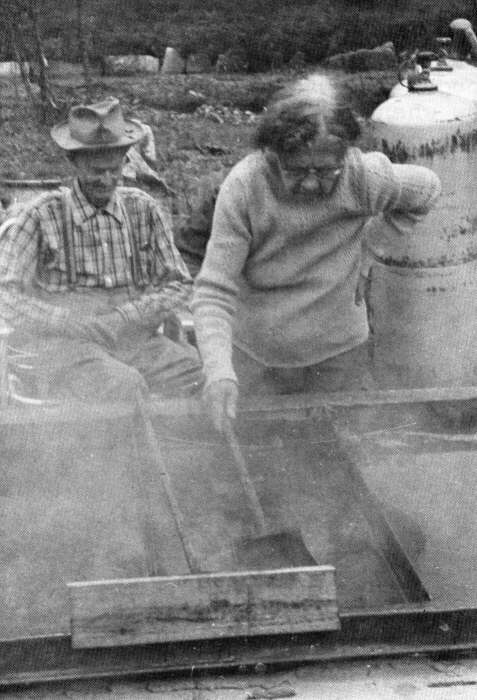
Myrtle Hough shown removing skimmings from the juice.
[27]
When the molasses in the last section reaches the desired consistency, it is drained out from an opening in the bottom of the pan. Collected in clean buckets or stone crocks, it is stored in jugs, barrels, crocks, metal buckets or other containers until it is used.
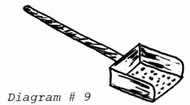
Diagram # 9
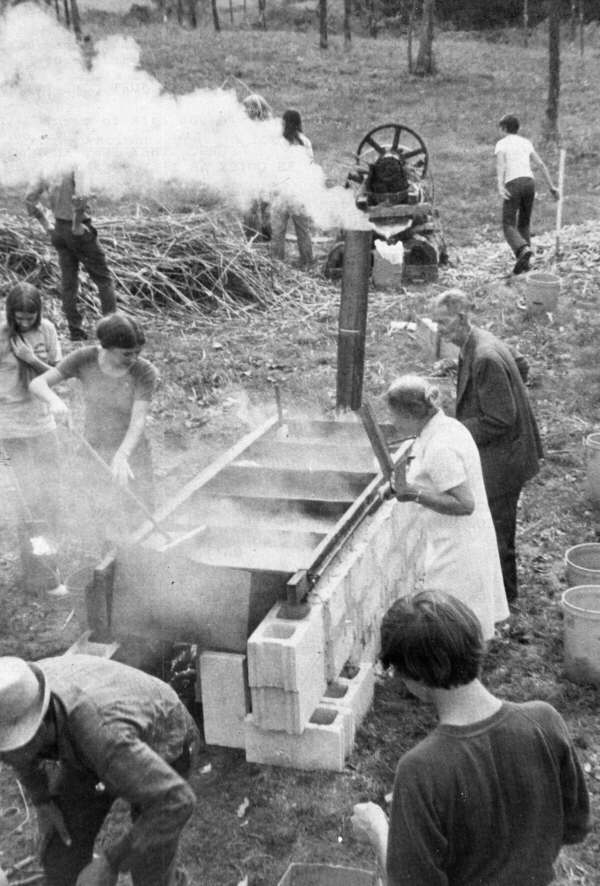
Cooking molasses requires constant attention to keep the fire regulated so that it is not too hot nor too low; and it takes constant attention to tend to the cooking so that the molasses does not scorch, cook too long or not long enough. It takes experience to know when to move the batches and it takes experience to move all the sections quickly before the pan gets too hot. It takes endurance to tolerate the wood smoke and pungent steam rising from the vat into the crisp autumn air. There is plenty of action going on when the mill is operating and the juice is being cooked.
Almost blinded by steam, Elvie unplugs hole to move boiling juice into next section.

Elva Hough using a pusher to stir the juice while cooking.
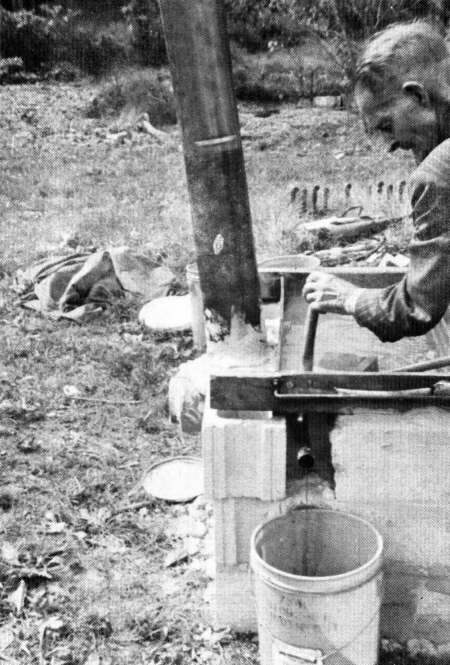
Finished molasses drains out of the last section.
[28]
We of BITTERSWEET did not realize what we were getting into last spring when we asked Myrtle and Elva Hough if they knew of anyone who still made molasses. They could not find anyone in the county that still made molasses since the Charley Smith family last made them a few years ago. (see photo page 20) So, to help us out and because they themselves hungered for homemade molasses, they and their son Charles decided to grow the cane and make some themselves if the BITTERSWEET staff would furnish the labor. Co-author of this article (and their grandson), Ronnie Hough, did the greatest amount of the labor with the rest of us helping out on thinning, harvesting and cooking.
Nothing the staff has done has more vividly taught the real meaning of our name BITTERSWEET. The hot and tiring hand hoeing, the never ending job of stripping, even the demanding job of tending the cooking vats represented the bitter. But more sweet than 'them molasses' was the warm friendships and mutual admiration which developed as the staff and the Houghs worked together that long October weekend when we all learned how to make sorghum molasses--bittersweet style.
[Ed. note: We'd like to give special thanks to Charles D. Hough for giving us a chance to make molasses first hand, and to Arnen Beery for loaning us his mill and pan.]
The valuable copper vat must be cleaned for storage.

Mule power turns the mill to extract the cane juice.
Photos by staff.
[29]
Copyright © 1981 BITTERSWEET, INC.
Next Article | Table of Contents | Other Issues
