 |
Volume X, No. 1, Fall 1982 |
FROM THE CAVE TO THE PIT
MAKING POTTERY INDIAN-STYLE
by Cindy Lee
Photography by James Heck, Gina Jennings, Scott Jeffries, Cindy Lee and Allen Gage
The cave was cool and dark, a welcome relief from the hot.summer sun outside, as we stopped to catch our breath before venturing in further to get clay to make our own pottery, Indian-style. Eric Purves, who had worked with primitive methods of firing, talked about how the Indians used to make pottery while I examined a broken piece of primitive pottery he had brought along. I could see the little pieces of mussel shells that had been used in it.
Going back into the cave was almost like going back in time, because a cave remains almost unchanged year after year. The rocks were different shades of red, yellow and gray. Water dripped slowly off the stalactites hanging from the ceiling. I could imagine the Indians filing past, carrying torches and baskets or leather bags, coming to get clay just as we were doing.
We picked up our buckets, flashlights and shovel, going back into the cave in search of clay that was fairly pure, had good elasticity, texture and color. We finally found a place where there was a brilliant red pocket of clay in the wall and more clay of a different shade of red on the floor.
We were excited about finding the different colors of clay, because varied colors of clay would mean a variety in the color of our pottery. The clay was very sticky, and as we walked on, dug, and tested the clay, it stuck to our faces, hands, clothes and hair.
We took turns digging the clay because it was harder to dig than we had expected it to be. It was heavier, stiffer and denser than dirt or mud. We filled one bucket only halfway because we did't think we could carry it if it
We left that bucket sitting there full of the bright red clay while we went farther back in the cave in search of more clay, preferably of a different color, maybe some yellows or grays. When we picked up our buckets to leave, it seemed as if they had gotten heavier.
We shifted the buckets from hand to hand and stopped often to catch our breaths as we squeezed through the narrow passages.
By the time we got out of the cave, our shoulders were aching, we were covered with clay and were dead tired.
We still had a long way to go in making the pottery because getting the clay was the first of many steps. We had to make the pottery, most of which would be trial and error, and we had to dig holes and fire the pottery.
The Indians probably did everything except the firing in one day, from getting the clay, making the pottery, and setting it out to dry, to digging the holes to fire in, although they probably used the same holes over and over. They would let it set a few days before they would fire it.
In most primitive cultures the women were the potters, but that was not always the rule. A lot of it had to do with the size and purpose of the pottery. Usually the women were the potters because of the definite division of labor. The man would have such responsibilities as hunting and making weapons, while the women would have such chores as preparing the meat and making the clothing. In a hunting society like that of the Indians in the Ozarks, pottery was probably a domestic chore.
Most of the steps in this article follow basically the primitive Indian way as Eric Purves does it. However, we have shortened some steps since the Indians did not have some of the equipment and supplies we used.
GETTING THE CLAY
To make the pottery the first thing you need is clay. If you can get clay from a cave it will be a better working quality clay than if you buy it because it is cured. Generally speaking you would not want to get clay from a roadside or riverbed since clay found any place outside a cave would not be very good because of the foreign or organic matter in it. The foreign matter causes it to dry quickly, prevents it from absorbing water well and causes it to fall apart when working with it. The natural clay from a cave has been there for thousands of years, absorbing water and fermenting, getting better all the time. The longer the clay ferments the more plastic it will be. Since cave clay is mostly mineral deposits, it is very good clay to work with.
[19]
Before going into the cave to get the clay, you need to make some preparation. First you need to bring some equipment. You should have at least one flashlight, lantern or other source of light for each person, buckets to bring out the clay and a shovel, preferably a small one with a short handle. Next, since the clay will not wash out well, you should wear old clothes and do something to protect your car from the clay by using plastic to cover the seats and/or bringing a change of clothing.
Finally, be sure you tell someone where you are going--never go into a cave by yourself--and mark your way so that you will not get lost.
When you choose a cave, there are several things to think about. We picked the cave we did because it was only fifteen miles away, we could drive relatively close to the entrance, we knew it had good clay in it, and the clay was relatively easy to get to without a lot of crawling through holes or wading through mud and water. The clay needs to be easy to get to because it will have to be both dug and carried out. It is difficult to carry a large bucket of clay through a small tunnel.
To get the best clay go back into the cave because the clay in the mouth of cave will be mixed up with leaves, dirt and other foreign material.
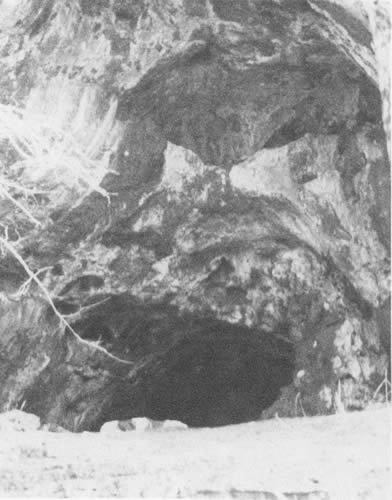
Good clay for making primitive pottery can often be found in Ozark caves such the Upper Howell Cave (above). The purest clay is usually located back in the cave away from the entrance between rock layers (below).

[20]
Look for clay not only on the floor of the cave, but also on the walls where it has oozed through into a pocket or hole where the clay has collected.
Before actually carrying the clay out of the cave, it is advisable to test it to see if it is any good. But since about ninety percent of the clay in a cave is usable, it is not obligatory that you test it. If the clay is sticky as you are walking along and the ground tries to pull your shoes off, you might want to test it. There are some simple tests you can use in the cave and one to use later.
Although the clay is sticky, if you rub your finger across it, it should leave a slick streak instead of pulling apart. If it pulls apart, it is a short clay or clay that is not good to work with. You can also make a coil. Good clay will bend without breaking apart. (Photo 1) In fact, with a really good clay, you can nearly tie it in a knot.
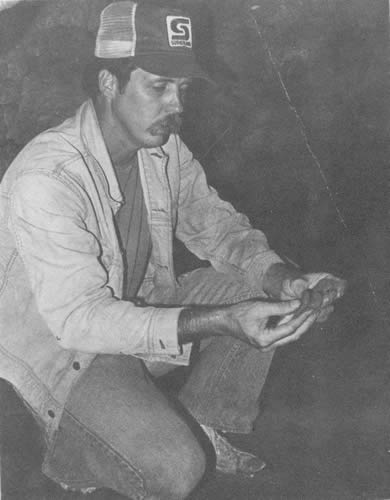
1--When you find a vein of clay, a coil of it. Good clay will not break apart.
A short or unpure clay will break.
The best way to test clay to see if it is pure is to use the drying test, though this test is impossible to do in the wet cave atmosphere. Put some clay on an old board or plaster bat to see how quickly it loses moisture. A good clay will set out a very long time before becoming dry, whereas an impure clay dries quickly.
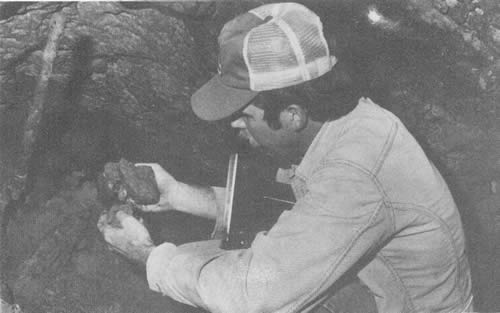
While looking for good clay in the cave you might watch for the presence of limestone and sandstone. Sometimes there will be large chunks of limestone in the clay, usually from pieces of stalactites breaking off the ceiling. (Photos 2 & 3) Also since a large portion of the walls and floor of the cave is limestone, there may be large chunks of limestone where it has cracked and fallen off the walls and ceiling and come loose from the floor.
Try to get the larger chunks of limestone out before taking the clay out of the cave. You will purify the clay later to take out the rest of it. Limestone in the clay is undesirable because if a piece of limestone gets in the pottery, when it is fired, the limestone will either melt or explode. An explosion caused by limestone is called a popout. In a lot of primitive pottery there will be a little white object in it that looks like a rock and part of the pot will be blown out. That was caused by a popout.

Photos 2 & 3--Often present in the cave clay are pieces of limestone, sandstone and perhaps stalactites (above).
[21]
Also, if the clay feels gritty, showing that it has a lot of limestone grit in it, you might want to try to find a purer bed of clay, but it is not necessary as you can purify it later.
There is no special care needed for the clay after getting it out of the cave. You can either let the clay set in an open bucket or cover it up until you are ready to work with it.
PREPARING THE CLAY
Purifying
After you get the clay out of the cave, the next thing to do is purify it. There are two ways to do this--the dry method and the wet method.

Photo 4--To purify with the dry method, dry it, mash and sift.
To purify the clay with the dry method you will need a screen (a wooden frame with ordinary screen wire nailed onto it), a hammer, a bucket, water, and something to lay the clay on and under, such as a large piece of heavy denim.
For the dry method, dry the clay completely by letting it set in an open bucket. Then smash it up into a powder and sift it. (Photo 4)
To smash the clay put it between some material such as denim so that it will stay in one place, and pound it with a hammer. Sift through a screen to remove all the foreign matter by shaking the screen back and forth. After doing that add water until the clay gets mushy. Put it in a sealed bucket and let it ferment for at least two weeks. The longer you let it set, the better the clay will be.
There is some advantage to purifying the clay with the second method, wet method, because you will be able to work with it sooner and it will be a little better quality. When you purify with water, you will need at least two buckets, water and a screen.
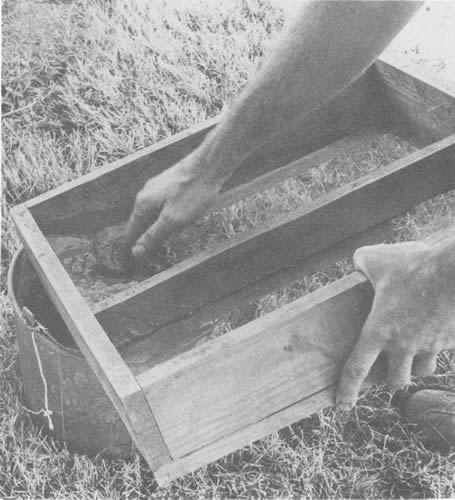
Photo 5--To use the wet method, make a soupy paste and rub through a screen.
[22]
First add water to the clay until it is a soupy paste, and then pour it into a screen and gently rub it through. (Photo 5) Any pieces of limestone that are big enough to cause any problems will not go through the screen. Let the screened clay set overnight so that the clay settles to the bottom. Pour off the excess water.
In this state the clay should be really mushy and unworkable. To get it in a workable condition spread it out on a plaster bat or an old board for several hours or overnight to draw out the moisture. When the clay is in a workable condition, it is not really wet and mushy and it is not dry and hard to work with. It should be ready if you can make a coil without cracks appearing in the clay.
Temper
The next step is adding grog or temper to the purified clay. Grog is ground up clay that has already been fired. Temper is sand or ground mussel shells.

Photos 6 & 7--Add temper to the clay and knead in thoroughly.

Temper helps the clay resist warpage and cracking, not only when it is being built but when the pottery is being fired. When the pottery is being fired, temper acts as a guard against thermal shock since it has the ability to expand and contract according to temperature.
We used mussel shells on part of the clay and sand on part of it, though there is not really any advantage in using any particular one of the materials used for temper. Sand is coarser than mussel shells which are coarser than grog.
If using mussel shells, you will need quite a few of them, depending on how much clay you get. You will probably need at least two large buckets of shells for a medium-sized bucket of clay. Break the shells up and sift them through a screen.
If using sand, it is a good idea to sift it so that there will not be a lot of junk in it. Grog should be ground up and sifted like the dried clay.
Add 35 to 50 percent temper. Since you do not want to do a whole bucket of clay at one time, use just a comfortable sized lump. Put down the clay and pour out a pile of temper that looks like the right amount. (Photo 6)
Wedge the clay to mix in the temper. Since clay is wet and sticky, you should wedge it on something that will absorb moisture and that the clay will not stick to, such as a plaster bat or a canvas-covered board.
To wedge clay and mix in the temper just lay the clay on the temper and knead it like kneading bread, folding it over and over. (Photo 7) Keep the clay fairly soft and sticky. Otherwise the more temper you add, the shorter the clay will become. It takes only a few minutes to wedge the clay but there are a couple of things to check before you are done.
First check for the presence of air bubbles, which will cause the pottery to explode when fired. To find air bubbles cut the lump of clay in half several times. An air bubble looks like a little pocket in the clay. If you find any, wedge the clay until there are no more.
Also check that the temper is evenly distributed. If spread evenly on your hands, it should be spread evenly through the clay. You can also notice its consistency when you are checking for air bubbles since you can see the temper or grog in the clay. (Photo 8)
[23]
FORMING POTTERY
The next step is to form the pottery. There are three different methods--pinch pots, slabs and the coil method. The coil method is probably what most of the Indians used because they could make larger pots and get more variety of shape.
Tools
When building a piece of pottery, use a saddle, a large bowl form covered with canvas. (Photo 9) It helps the pottery keep a rounded shape instead of turning flat by helping support the pottery so it will not collapse. Since the Indians did not have canvas to cover the saddle, they probably used a shallow fired clay bowl.
To use the saddle, first make the bottom of the piece of pottery you are forming, put on a couple of coils, and then set the pottery in the saddle while you work on it.
Another tool the Indians used was a paddle, a smooth piece of wood used to "paddle" the clay to smooth it out and unwarp it.
Pinch Pot Method
The pinch pot method is the easiest and quickest way to form pottery, but the pottery will not be very good quality. To do a pinch pot all you need is a small lump of clay and your hands. Just "pinch" it out and form a bowl.
Slab Method
The slab method is also relatively easy, but you cannot get much variance in shape. When you do the slab method, you form the pottery out of slabs of clay. To do this method roll out the clay like pie crust and cut the pieces to fit. Score the edges that are going to be joined together by making little slashes or x's with a stick or a pin tool wherever the clay is to be joined. Then put slurry, a soupy paste made of clay and water, over the scored edges and join them together.
Coil Method
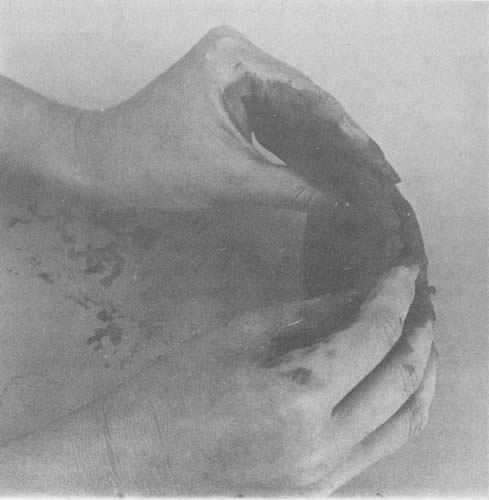
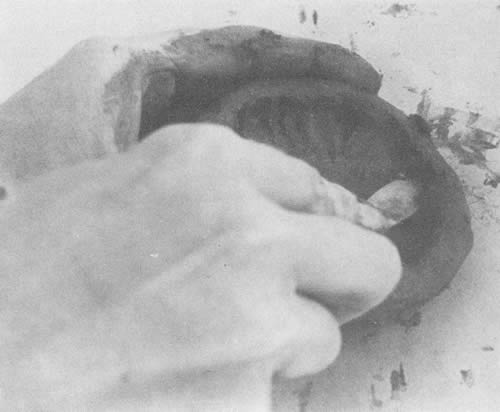
The coil method is a little more difficult but produces more variety of size and shape. Start with a small lump of clay and form a bottom by flattening the clay out into a round form. You can turn the edges up if you want, but you do not have to. (Photo 10) The bottom should be a little thicker than the walls.
After you get the bottom of the pot made, score the edges all the way around on the top edges. Then put on slurry where it has been scored. (Photos 11 & 12)
Now you are ready to start making the coils which form the sides of the pot. To make a coil, roll a lump of clay until it looks like a long fat worm. You do not want the coil to be as thin as the wall of the pot because you will make it thinner after you get it joined on. (Photo 13) You do not want the walls any thicker than one-fourth of an inch because believe it or not, the thinner the walls are, the better the pottery will be. The walls should be an even thickness, because a thicker part will dry slower than the thinner part, causing the pot to crack.
When you have the coil made, score the side that is going to join to the bottom. (Photo 14) The
slashes do not need to be very deep. Then put slurry on the edge of the coil that has been scored.
Lay the scored edge of the coil on the scored edge of the pot and start joining it together. (Photos
15 & 16) For this you can use either your finger or, if you have one, a pencil tool. Pin a little clay
from the edge of the coil down over the edge of the bottom, both inside and out, all the way
around. (Photo 17) After you get that done go around and smooth it over until you have a smooth
surface because you want the two pieces of clay to become one.
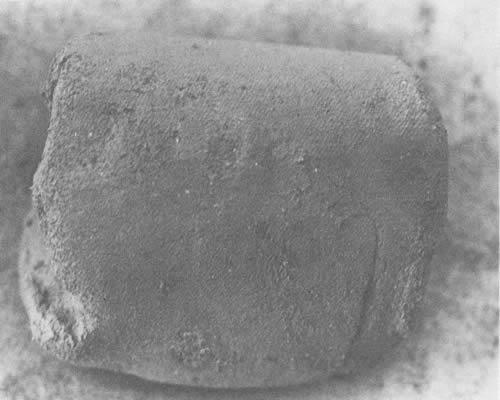
Photo 8--Distribute temper through evenly.
[24]
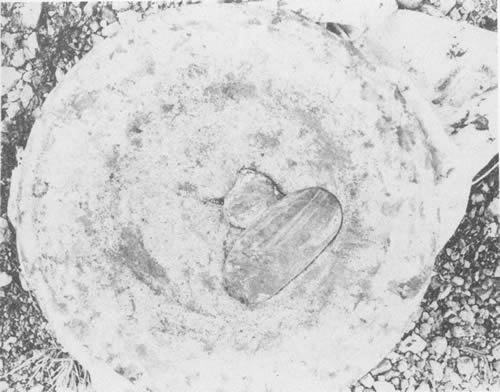
Photo 9--A saddle for forming pottery.
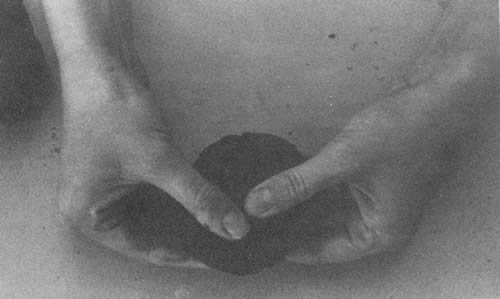
Photo 10 --Form the bottom first.
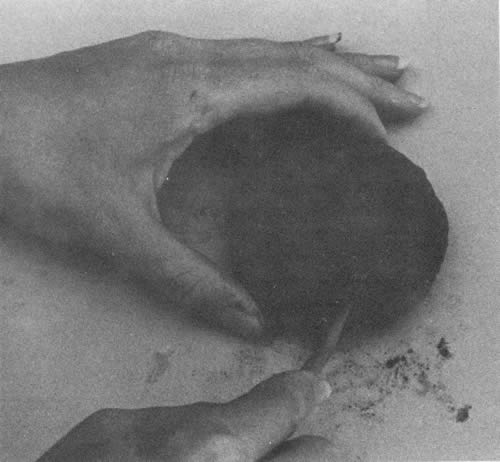
Photo 11--Score the edges.

Photo 12--Rub the edges with slurry.
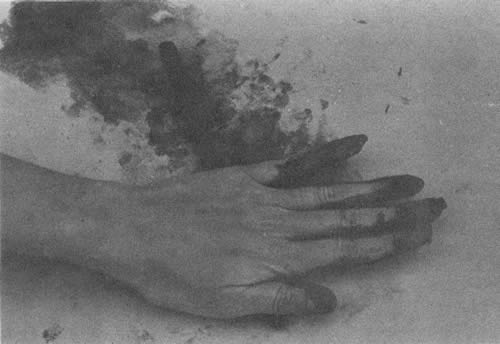
Photo 13--Make a coil a little thicker 1/4 inch by rolling a lump of clay.
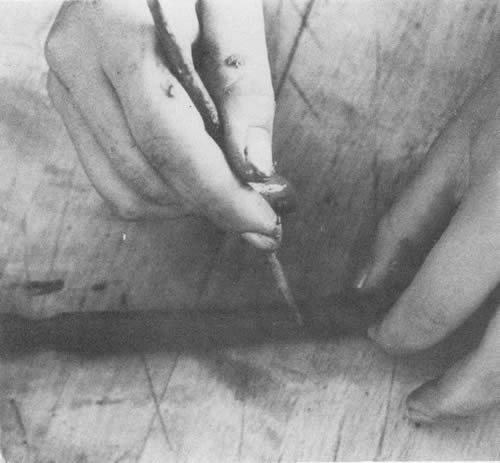
Photo 14--Score one edge of the coil just slightly.
[25]
(Photo 18) Use the same method to connect one coil to another coil. If you do not join the coil to the bottom and the coils to each other like that, if you just push the clay together, it will not stay together. When you have fastened the clay together, pinch it and stretch it up until it is the thickness that you want it to be. (Photo 19)
Drying Procedures
Do the pottery in stages, so that it can set up or dry a little, particularly if you are doing a large piece of pottery. If you do a small piece, you should be able to finish it without having to stop and let it set for an hour or so. If you cannot finish the pottery in one day, cover it with plastic and wrap the unused clay in a plastic bag.
You need to have the plastic over it when you are not working on it so that the clay does not dry out too much. If the clay dries out, you will not be able to add more clay to it because you put wet clay on dry clay, the wet clay shrinks out the dry clay does not, causing the clay to crack.
When you have completely finished a piece of pottery, leave a piece of plastic over it loosely for a day or two so that it does not dry out too fast and crack. When the clay dries slowly, the moisture is evenly distributed, so you do not have some spots drying before others, causing cracks. The Indians probably worked out in the sun on very dry days. Since the pottery started to set up while they were working on it, they probably kept going until they were done. Doing it in this manner, they did not encounter the same drying problems that we do when we take two or three days to finish a pot.
Photos 15 & 16--Beginning the pot.
Decorating
Often before firing their pottery, the Indians would decorate it in some way, especially if the pottery was for a special purpose. To decorate the Indians probably used a stick to draw a design on the outside. (Photo 20) Instead of drawing with a stick, often they would make slurry out of another color of clay and then use the slurry to paint the piece of pottery. They did both of these methods of decoration before firing. The designs were often war scenes that told a story and figures of animals--a form of anamism. They would also make pipes in the forms of flying birds or other animals.
[26]
Drying
Make sure that the pottery is thoroughly dry before you fire it. It should set for at least a week or
longer depending on the thickness of the walls on the pottery. While it is still drying, the pottery is
similar to stiff leather, but will still break easily. When it is properly dry, it will be very brittle and,
of course, it will not be damp.

Photos 17 & 18--The first coil is joined at the bottom to begin the pot. This material needs to be blended in on both the inside and outside. These photos show preparing the outside to blend them in.

FIRING
Since the pottery in this dried state is nothing more than dried mud, if you pour water in it, it will turn to mud. Therefore it needs firing to hold its shape when wet. Firing changes the molecular structure so the pottery becomes stone. However, firing Indian-style necessitates another step--sealing.
Sealing
Firing the pottery in the primitive style is a low firing process because the Indians had no way to get a really hot fire. Most pottery must be fired to about 2,000° F. to seal itself. Using a low firing process, there are several ways to seal it so that it will hold water. One way is to boil down locust sap and do one of two things with it. Either put it in the pot by itself, or mix it with another color of clay and decorate the pot with it. Another way to seal pottery is to polish it with a smooth stone. If you burnish it with the stone, the surface will mash together and seal itself. These methods are done before firing.
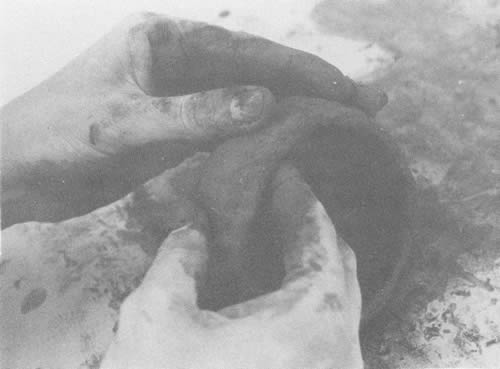
Photo 19--Smooth the surfaces and stretch to the desired thickness.
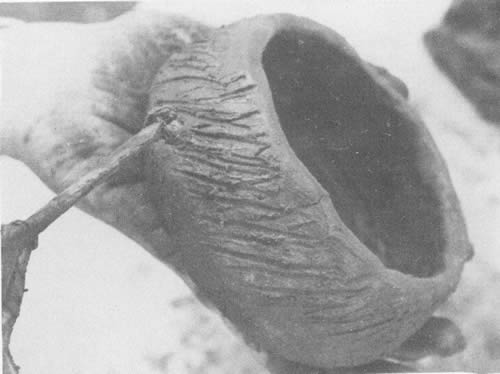
Photo 20--After the pot is finished it can be decorated. The Indians probably used a stick to draw designs.
[27]
Another method of sealing waits until after firing. After the pot is fired, rub the inside with lard.
When you cook with the pot, the lard cooks in and seals the pot.
Firing Holes
To fire the pottery, you will need to dig at least two holes that are about as wide as they are deep, from two to two and a half feet deep, depending on how much pottery you have. You need more than one hole as an insurance against breakage because, if one piece of pottery explodes, it could break everything else in the pit. So divide the pottery between the pits. Next you will need fuel for the fire, the more the better. There are three types of natural fuel--buffalo dung, green grass and wood.
The Indians probably used all of these fuels depending on their availability. Though dung is the best fuel to use, the Indians probably used grass a lot of the time because buffalo dung was not always available.

Photo 21 --Build a fire in a pit
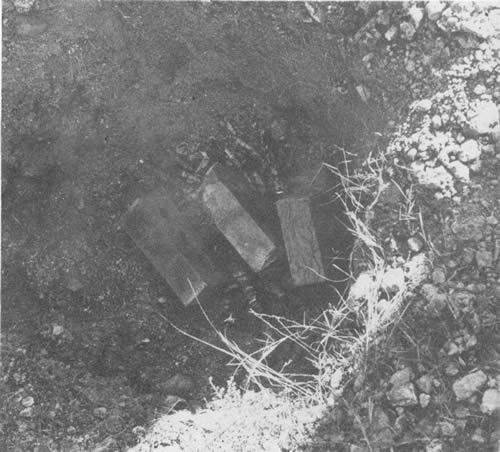
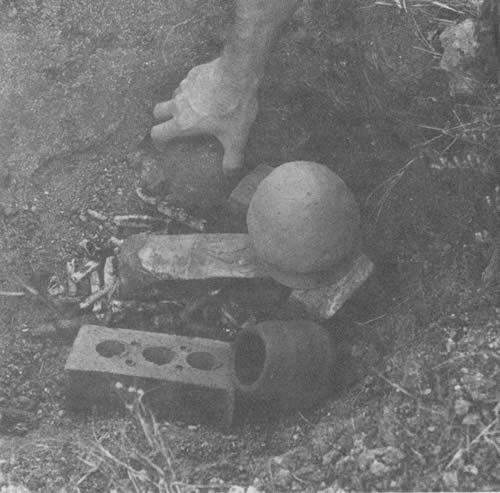
Photo 22 --When burned down to coals, lay in bricks to set Pottery on.
They may have also used wood. To use wood, build a wood fire and let it burn down to coals. Set the pottery near the coals, and gradually inch the pieces closer until they are in the coals. Then heap the coals over the pottery and build the fire up slowly and carefully. Let the fire burn down and let the pottery cool before attempting to move it.
With dung and grass as fuel the process is the same. Pottery will be harder and stronger with a hotter, longer-burning fire. Dung is the best for this. There must be enough dung to keep from exposing the pottery as it burns down. For two large holes you will need at least three large plastic garbage bags of dung.
Since the firing process takes all day, plan it for a free day. When the pottery is dry, you have
collected the dung and dug the pits, you can begin.
Fire
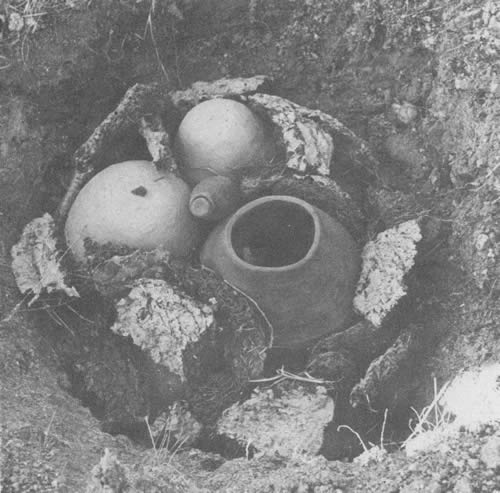
First start a small wood fire in the bottom of the pit. (Photo 21) Let it burn down to coals and then lay some bricks or rocks down in the coals. (Photo 22) The bricks are to set the pottery on, because if you set the pottery directly in the coals, the thermal shock would cause the pottery to break. Stack the pottery one piece on top of another, but do not put any of it above ground level, because a breeze hitting the pottery while it is really hot will be a thermal shock causing the pottery to break. (Photos 23 & 24)
[28]
Photos 23 & 24--Putting pottery in pit.
The finished pottery will be varied colors depending on how much fuel touches it. Where the fuel
is right against it, it will be black. Where the fuel does not touch it, it will still be the original color
of clay. If you do not want the fuel to touch the pottery at all, put something around it, such as
small pieces of sheet metal, or wrap it in aluminum foil. The Indians probably used pottery shards,
which are broken pieces of already fired pottery. Almost anything that will not burn will do. Break
the dung into pieces and stack it in and around the pottery. (Photo 25) Stack it up above ground
level as high as you want to. (Photo 26) The coals on the bottom should start the dung on fire
from there. Start another fire on top. (Photo 27) The fire needs to be started from the bottom as
well as the top so that the pottery gets heated evenly and does not break. After the fire gets
started do not add any more fuel because a slight jar or something hitting the hot pottery could
cause it to break.
Photos 25 & 26--Dung arranged around pots.

[29]
Let the dung burn, but be careful not to knock anything down inside the pit while it is burning. If something hits the pottery while it is hot, it will break. However, since you do not want the fire to burn too fast, after it gets burning, lay something over it such as sheet metal, or a couple of metal garbage can lids. The Indians probably smothered it down with wet green grass or wet dung.
As the dung burns down, the tops of the pottery may show, but do not add any more fuel. This was the reason you did not want any pottery above ground level.
Let the fire burn out completely, and let the pottery cool before you take it out. It should be cool enough for you to pick it up with your hands. (Photos 28, 29, 30)
The pottery just out of the pits will be covered with ashes. Simply blow off the ashes. The pots will be varied colors depending on the different amounts of fuel that was in contact with them.
As for the Indian's success in firing, there are accounts where sixty percent in a firing was good,
and then again there are accounts with no fatalities on a regular basis. A lot of it has to do with
the skill of the potter, the type of clay, and how much experience they had.
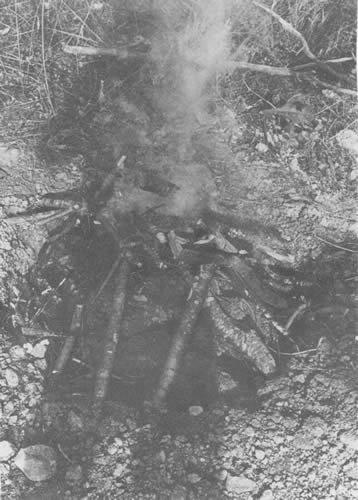
Photo-27 --When pottery is in the pit, start a fire on top.
Finished pottery is useful for many things. It is very decorative. It enhances decor with its warm
earthtone colors, especially when it has a plant or a dried flower arrangement in it. It can be used
as small animal feeders or waterers. Pots make good baking containers, giving bread a delicious
nutty flavor. You would not want to put them directly in a real hot fire, but they can stand a
325° F. oven, putting them directly inside and shutting the door. You can also give pottery
as gifts or even use it in a rock garden. It is very versatile.
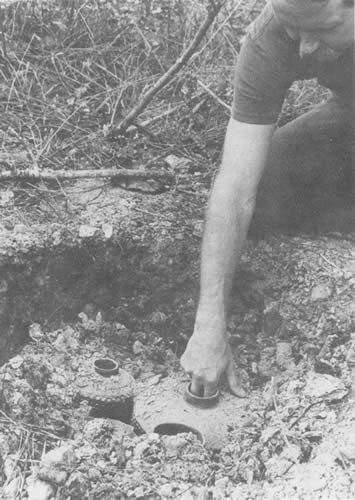
Photo-28 --Let the fire burn down and is cool enough to remove the pottery with your hands.
[30]
If your pottery does not turn out well the first time, follow the old saying and "try, try again." Pretty soon you should be able to turn out some nice pieces of pottery with no trouble at all.
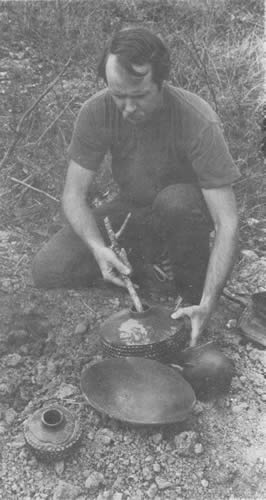
Photo 29 --Eric Purves removes the fired pottery from the hole very carefully to avoid breaking it.
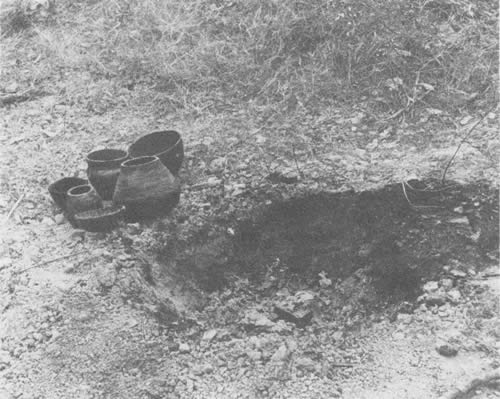
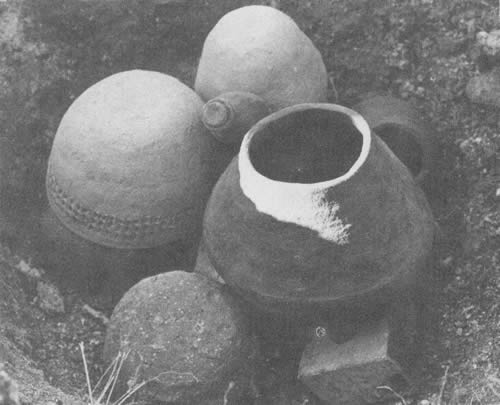
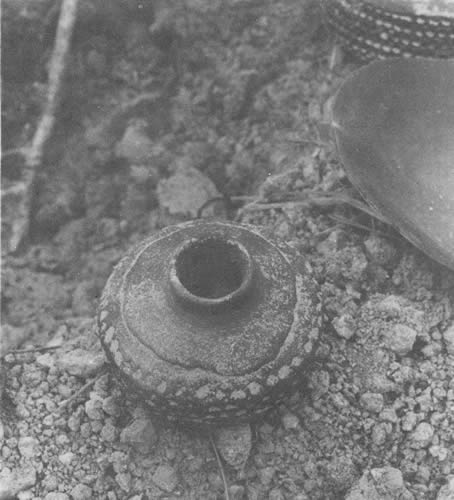
Photos 30 & 31 above--The completed pots just after being removed from the pit are covered with ash dust. Some that were covered for protection from the smoke and flames were the natural red color of clay. Others were black, while still others had mingled colors of black and red, giving a pleasing rustic appearance. The long process of making primitive pottery from the cave to the pit was over.
[31]
Copyright © 1981 BITTERSWEET, INC.
Next Article | Table of Contents | Other Issues

![[Title photo]](10i1p18.jpg)