 |
Volume IV, No. 4, Summer 1977 |
SUNBONNETS
by Terri Jones
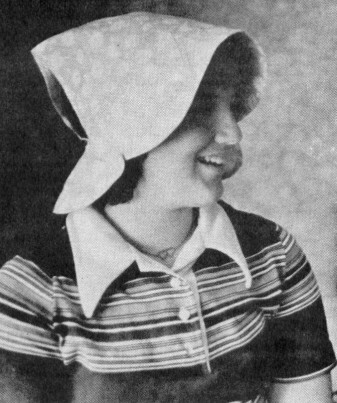
Sunbonnets were a necessary and functional item in all farm households in great-grandmother's day. Almost always there was some sort of bonnet hanging on the kitchen door knob. Women and girls wore their bonnets everywhere they went--to church, to the neighbors' homes for visits and the country store for weekly supplies. From sunrise to sunset the women wore bonnets while doing farm chores, for no lady ever got a sun tan. To make sure they stayed lily white, they wore bonnets to protect their faces and necks from the blazing Sun and hot summer winds.
During the week and on Saturday, women wore their everyday, often faded plain bonnets with their dresses. Older women usually had dark or drab colored bonnets such as navy blue, brown or black but young women and girls preferred bonnets made of checked gingham and colorful calico prints. The small girls in the homes would have bonnets made out of a dainty flower print or bright pastels.
However, when the Sabbath Day came they brought out their Sunday best. The Sunday bonnets were of various colors, often matching the dress. Older women usually wore black ones with perhaps a ruffle around the back of the brim. These black bonnets were of any type pattern. It was more or less traditional for the older women to wear them to a funeral, cemetery, to church or anyplace. There really wasn't any certain time to wear them.
The Sunday sunbonnets were often made from suazette, a silky looking all-cotton material like a chambray or polished cotton. The nearest material to suazette today is fifty percent cotton and fifty percent dacron.
"Sometime people would make a fancy bonnet," Edith Sutherland said. "They put a tie on the crown part of the bonnet and I've seen them with little bows on them also for decoration."
To add to the bonnets, many times women would wear aprons to match their bonnet. The apron was simple, requiring only a yard of material gathered at the waist with a wide waist band tied with a big bow in the back. Frequently the aprons were of gingham and decorated with band of cross-stitching across the hem.
In the mid eighteen hundreds women's hats began to be manufactured in large quantities, and eventually these hats became available in Ozark country stores. In the years to come the popularity of the sunbonnets slowly faded out with the younger generation who turned to the more fashionable and dressy hats for church and social gatherings. But the older women continued to wear the traditional sunbonnet outside the home and to church as in the years before.
Not only did hats become more available, but also the styles of clothing and fashions of hair changed. Sun tans became fashionable and by the end of World War II, sunbonnets were a thing of the past.
"Sunbonnets were kind of hard on your hair," my great-grandmother, Annie Martin, commented. "And since everyone has a pretty big hair-do now-a-days, people just don't wear them anymore. I never wore one much because I was never crazy about them. They are a hot thing and they're like blinders. You can't see anything except what's right in front of you. But a lot of women never wore anything else."
Sunbonnets were a country garment. After hats came in style, as early as 1850, city women did not wear bonnets. But country women did for they spent several hours each day working outside in the sun, in the garden, caring for the chickens, doing chores and sometimes even working in the fields alongside the men. They didn't wear them for good looks. They wore them for protection.
[25]
MAKING A SUNBONNET
Almost all bonnet patterns have three basic parts, the brim, the crown and the ruffle or tail.
The brim is the front of the sunbonnet that shades the face. To get the greatest protection from the sun, the brim needs to be stiff enough so it does not flop in the face but sticks out and protects the face. To achieve this stiffness it is always doubled and interfaced. Many brims were quilted on treadle sewing machines for even more stiffness. Very seldom was it done bY hand since hand quilting wouldn't be stiff enough. The quilting lines were copied from regular quilting patterns or could be parallel lines drawn by the seamstress starting at one side and working to the other. If the designs were elaborate it was a tedious job, working on the treadle and manipulating around the curvature of the leaves, flowers and other designs that brightened up the bonnets.
Another way of making the brim stiffer was the simple process of starching. Though women starched the whole bonnet, they put a heavier starch on the brim. Many made their own cooked starch which used the ingredients of any kitchen. To reproduce this starch mix two heaping tablespoons of flour and one level tablespoon of salt. Add to this a small amount of cold water and stir to make a paste. Gradually add two cups of boiling water to the paste, stirring continuously and cooking until the mixture has a smooth, creamy texture and reaches the desired thickness. Then let it cool.
Some women made starch to use on dark calico prints substituting coffee for water. The coffee being dark, avoided the white residue often left with the flour water starch on these dark materials.
When the starch is cool, dip the wet bonnet in it. Then let the excess starch drip off into a bowl. Lay the bonnet outside to dry. Long ago women used to lay them on a post to help keep their shape as they dried. Before completely dry, bring them in to iron. Those that button or snap can be taken apart and ironed flat.
When ironing these heavily starched brims, an effective way of cleaning the iron if it gets clogged with starch, is by running the hot iron over some spread out cedar needles. Or put some salt on a sheet of paper and iron over it slowly.
The second part of the sunbonnet is the back or crown. Many women had long hair, usually worn up in a bun where the bonnet covered it. The larger the hairdo the puffier the crown needed to be. To get this effect they simply cut the crown larger with more fullness.
The ruffle or tail, the third part of the bonnet hangs down on the back under the crown and sometimes extends under the brim on both sides of the face. This piece protects the neck from the sun and wind. On some bonnets the ruffle is cut a part of the crown, as the split bonnet, while on others it is cut out separately. It can then be sewn on as in the gathered bonnet or it could be buttoned on.
Most bonnets also had ties to keep it in place. These tied under the chin so that even a strong wind would not dislodge them.
Most women had no bonnet patterns. They either ripped out an old tattered bonnet as a guide to cut by, or they cut them out by guess. Annie Martin and Edith Sutherland have taken out the guess work for us by cutting out patterns from four old bonnet styles--the button bonnet, the snap bonnet, the split bonnet using cardboard staves and the gathered bonnet. We have reduced the pattern pieces to fit the Page. To use the patterns on page 30 first mark off inch squares on newspaper or some large pieces of paper so it resembles graph paper. One square of our pattern will equal one inch of actual size. Enlarge the pattern pieces by following the same curves and lines in the inch squares as in our small squares. Following are the directions for making these four bonnets.
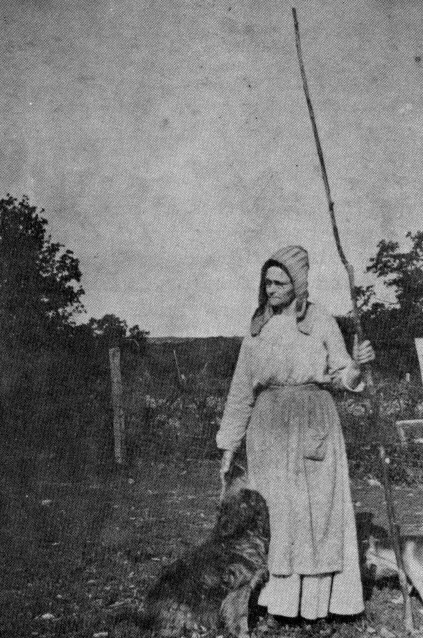
Martha Caffey and her dogs prepare for a day of fishing around 1920. Part of the essential equipment were her split bonnet and apron.
[26]
Button Bonnet
This bonnet is what you might call hole-ey with eighteen buttonholes. It is a fairly simple bonnet to make if you don't mind making a lot of buttonholes and sewing on eighteen buttons. Laundering is a cinch. All you do is unbutton all of the pieces, wash it, starch it and iron it flat. Then button it back together again!
The button bonnet requires about 3/4 yard of material, 18 buttons and some stiffening for the brim. Today the stiffening most often used is polyester pellon. Years ago women used any extra material. The finished bonnet unlike the other bonnets, is in three separate pieces. When cutting out the pattern pieces, cut one each of the crown and tail, and two of the brim out of the bonnet material and one of the brim out of the stiffening for interfacing.
The brim--piece B. Pin right sides of the brim together with the stiffening pinned to the wrong side. Using 5/8 inch seam allowances stitch all around the brim, leaving an opening large enough to turn the brim. Clip corners and trim seams. Turn brim right side out and sew opening closed by hand.
Press brim and quilt on the machine to help make the brim stiff. Any quilting pattern can be used,
but the simplest is a stitching that follows the curves of the brim. (diagram 1) The closer the
stitching, the stiffer the brim. Most stitching is about 1/4 inch apart.
Now you're ready to sew on the buttons. Sew seventeen buttons on the brim, fifteen along the
straight edge and One each on the curve. (see marks on piece B)
Cut two ties, 1-1/2 inches by 17 inches. Hem edges of ties using a shirt tail hem or bias tape. Then sew on to the brim two inches back from the edge where buttons are sewn on.
The crown--piece A. Cut a facing on the bias about 1-1/2 inches wide to fit the curved part of the crown and a bias binding about an inch wide to fit across the bottom of the crown. Sew on facings and hem. These facings finish all raw edges and give enough body for button holes and buttons. Sew button holes and buttons where marked.
The tail--piece C. Cut a bias binding about an inch wide for the outside curve. Sew on and hem. Cut a facing on the bias about 1-1/2 inches wide and sew on inside curve. Hem and sew five button holes as marked. The bonnet is now ready to button together and wear.
Snap Bonnet
This bonnet looks more like a cap than a bonnet because it has no ties. Spread out it looks like a diaper because of the bringing of the three sides together. (diagram 2) Like the button bonnet it is easy to iron. It is also easy to make and takes 1/2 yard of 45 inch material, four snaps and an 8x18 inch piece of stiffening.
Side view of the but ton bonnet showing the three pieces buttoned together.
[27]

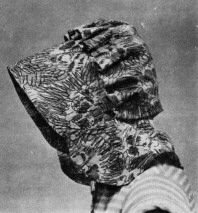
The gathered bonnet on the right is over a hundred years old. Made of black suazette, it is decorated with fancy quilting in red thread on the brim. The gathered bonnet on the left has a more rounded brim and a shorter tail.
The brim and crown--pieces A and B. Pin right sides of facing (B) and brim and crown (A) together matching single notches. Pin interfacing or stiffening to wrong side and sew. The bottom edge should be left open. Clip and trim seam. Turn and press. Quilt brim.
Hem line 1 with a shirt tail hem, but not line 2. Sew on snaps where marked.
1. One quilting pattern for the brim. 2. The snap bonnet when unsnapped showing location of snaps and quilting of brim.
Tail--piece C. Pin right sides together and sew leaving an opening of about 5-1/2 inches in the center to insert the end of piece A. Clip and trim seam, turn and press. Insert line 1 of piece A in the opening, matching double notches and top stitch. Sew snaps on tail as marked, snap together and the bonnet is done.
Above--The snap bonnet is similar to a cap. Below--A variation of the split bonnet requiring two pattern pieces.

[28]
Split Bonnet
This bonnet was perhaps the most prevailing bonnet of them all. The brim is stiffened by cardboard splits which were usually cut out of shoe boxes. These were slid into the brim. To wash, women just removed the splits. Many times this bonnet was made from a shirt tail when the rest of the shirt was worn out. There are many variations of the bonnet, but the pattern we have picked seems to be the easiest to follow. It is one pattern piece plus a band and two ties. It takes about 2/3 yard of 45 inch material and nine cardboard splits 1-1/2 by 9 inches.
Brim, crown and tail. Clip to fold line as shown. Fold the brim part of piece A back, right sides together on the fold line so that it is even with the hemmed line of line 2. Turn under the edge of line 1 and sew down the sides but do NOT sew closed the opening of line 5. This is where the cardboard splits will go. Divide the brim area into approximately 1-3/4 inch pockets and sew, back-stitching the ends. (diagram 3) Sew a shirt tail hem around lines 2 and 3. Sew the gathering line of line 4 with long stitches. Gather. Sew line 4 together matching single notches. Sew ties on as marked about four inches from the brim.
Band. Sew up band, right sides together, clip, trim seam and turn. Sew band on back of bonnet even with the first cardboard split on each side as marked. Insert the cardboard splits in the pockets and the bonnet is ready to wear.
Gathered Bonnet
This bonnet was another very popular bonnet. It has a very full crown for bigger hair-dos. This pattern requires 3/4 yard of 45 inch material plus some kind of stiffening for the brim and a yard of matching ribbon.
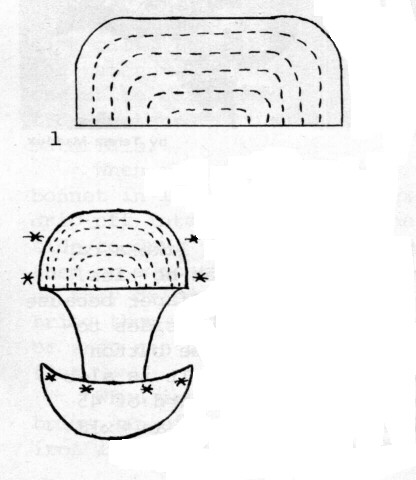
The brim--piece B. Follow the directions for making the brim on the button bonnet up to sewing on the buttons. The bonnet we took this pattern from was made of black suazette and used red stitching and quilting on the brim in a "flowerette" design for decoration. (diagram 4)
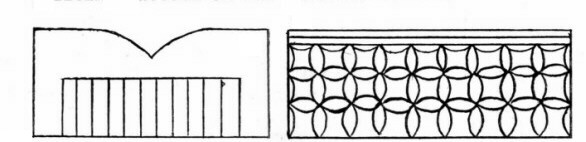
3. The split bonnet with line one folded back and pockets for splits sewn. 4. A quilting pattern on the gathered bonnet.
The crown--piece A. Using long stitches on the machine, sew a double row around gathering lines 1. Gather the curved part of the crown until it fits the brim (about 18 inches after gathering). Sew onto brim, matching single notches.
Sew gathering stitches on line 2 and gather to about 8 inches.
The tail--piece C. Sew a shirt tail hem around three sides, but NOT on the side to be gathered. Sew gathering stitches along unhemmed edge and gather to about 18 inches. Sew tail onto brim and crown, matching double and triple notches.
Sew two pieces of one inch ribbon 17 inches long to the brim where marked, just where the brim and crown are sewn to the tail. This ribbon will be tied behind the bonnet to fit it to the head.
Make two ties as in the button bonnet and sew to the brim as marked to tie under the chin. The bonnet is ready to wear.
Like calico and suazette, the materials they were made of, sunbonnets are no longer in use. But in the days gone by they were a necessary part of life for the Ozark farm women and girls and served their purpose well.

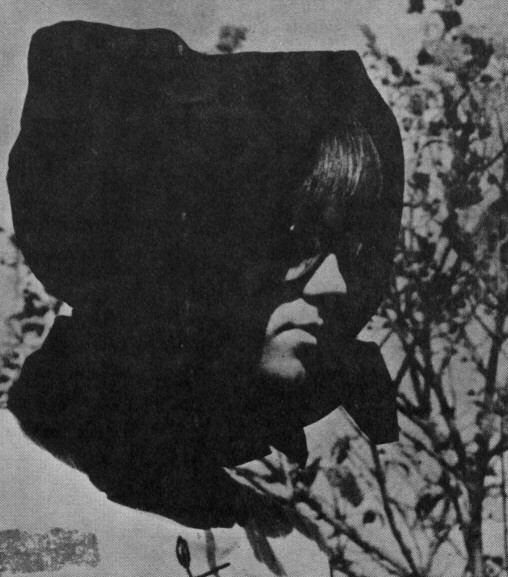
This old split bonnet made by Edith Sutherland was for everyday wear and shows signs of long use.
[29]
FOUR COMMON SUNBONNET PATTERNS
To use the patterns on this page first mark off inch squares on newspaper or some large pieces of paper so it resembles graph paper. One square of our pattern will equal one inch of actual size. Enlarge the pattern pieces by following the same curves and lines in the inch squares as in our small squares.

[30]
Copyright © 1981 BITTERSWEET, INC.
Next Article | Table of Contents | Other Issues
