 |
Volume V, No. 4, Summer 1978 |
The Most Beloved
by Vickie Massey
Photography by Stephen Ludwig, Illustrations by Patsy Watts
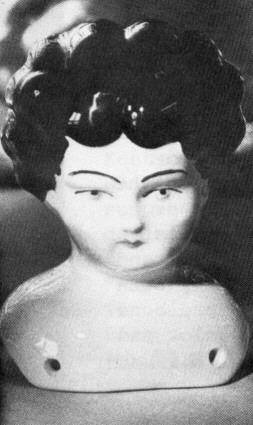
Dolls are one of the oldest forms of entertainment, dating back to ancient Egypt. Today dolls are also a very popular toy, even though they have changed. As people reminisce about childhood days, many still think first of their old chipped china head doll. Some have said that the china doll is the most beloved of all dolls. This may be because it was the doll their grandmother carried across the prairie, or maybe because, though simple, they had a beauty that modernized dolls don't seem to possess.
Many of these dolls created memories, both beautiful and sad that lasted a lifetime. The sad stories are usually that the doll has been broken. Corabelle Palmer said of a doll she received for Christmas, "I was raised in the home with all these old bachelors. I had laid my doll on the end of the sewing machine under a shaving mirror. Sometimes my uncle would put me up to something he didn't hardly know about. I came in with my hammer and he looked down at me and said, 'Why don't you just knock its brains out?' That's just what I did."
Today there are people who have revived the art of making these dolls. They repair broken dolls, replacing missing fingers, arms or broken heads on family heirlooms or rebuild an entire body to fit a treasured head. They also make completely new dolls patterned after the dolls of years ago. Those who have lost their dolls find the price of original dolls unbelievably high, so many choose a reproduction. Reproducers carefully follow all construction details and paint the dolls by hand, taking pride in their work. Elsie Logan is one such artist who gladly shared her skills with us.
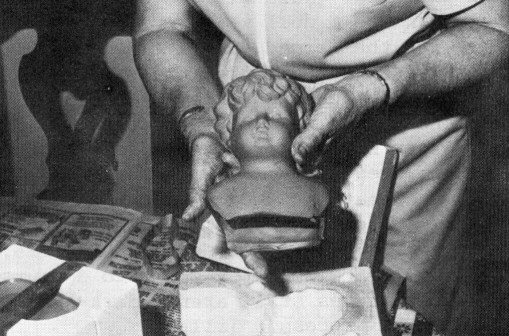
Since making the entire doll is a large undertaking, many prefer to buy the doll already made up, or buy the head, hands and feet and just make the body. But we will give directions for making the entire doll for those who want to do everything themselves.MAKING THE MOLDMolds for the head, hands and feet may be purchased or made. For most, buying or borrowing a mold is easiest, but a mold may be made for an original piece or a head for which you can't find a mold. [ill. 1]
You will need plaster of paris, a box 4 to 6 inches wider than the head to be molded, some cardboard pieces, tape, petroleum jelly and, of course, the head you wish to reproduce. First make the mold marks on the original head. These marks divide the head in half. Elsie prefers to divide the front of the head from the back, from ear to ear, but it may be done by dividing the face in half also. Cover the half to be molded with petroleum jelly to prevent sticking. If it is covered too heavily, the details won't come through when it is molded, but if it isn't covered heavily enough, it will stick to the mold and be ruined when you try to take it out.
[49]
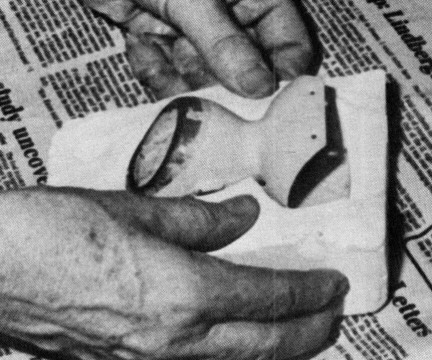
ill. 1--The mold is made from an original head.
Pour the plaster (mixed according to directions) into the box allowing space to place the head. Push the head into the plaster up to the mold marks. Let the plaster start to set up. When it gets firm, make two indentations with a spoon in the plaster of paris on each side of the head well away from the head. [ill. 2] Now allow the plaster to dry completely. Remove the head and the box from around the first mold half. [ill. 3] With the cardboard and tape construct a "box" around the first mold half, making it the same dimensions only twice as tall. Remove the newly formed box and apply petroleum jelly to the mold and head being molded, following the same precautions as before. Be sure to cover the top side and indentations, otherwise the mold halves will stick. Put the head back in the first mold half and replace the new box. This box insures a proper fit of the mold halves. Pour more plaster around the head, completely covering it. Knobs or mounds are formed when the plaster fills in the previously made holes or indentations. These knobs and holes fit the two molds together exactly when actually molding the doll. Allow this to dry thoroughly.
Remove the box and the top mold and then take out the head. The mold needs a hole made to pour clay into. Put the two halves of the mold together and with a hammer lightly tap the end where the shoulder is. The plaster should break away leaving a ragged opening. Smooth the edges with a sharp knife or similar object.
The mold is now completed and should be stored in a warm, dry place clamped together.
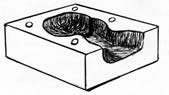
ill. 2--The holes for matching mold pieces are placed well away from the head.
MOLDING THE HEAD
There are several types of clay that may be used to make dolls. Elsie uses a clay made of clay flour, soda ash from Kentucky, silicate and a deflouculant which is added to keep all the material suspended in the liquid. For bisque dolls, a finer grade of porcelain, she uses more expensive clay. She explained, "Any fired clay with a glaze is china. The bisque is a different type of clay. Bisque is any fired clay without glaze. Porcelain bisque is so highly vitreous that when fired, it is non-porous.
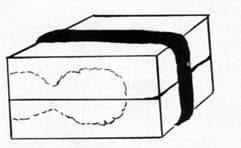
ill. 3--The head lies inside the mold in a position similar to this. Holding the mold together is a band.
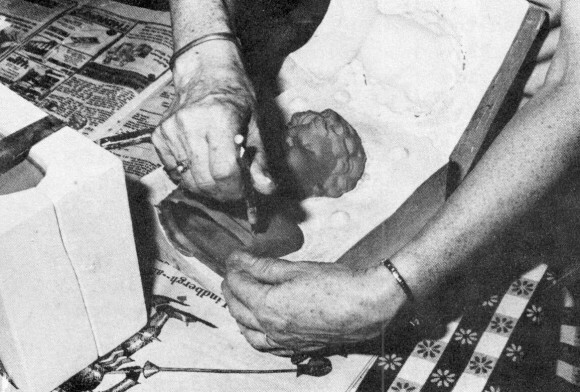
ill. 4--Trim damp head while still in mold.
[50]
The mold is made of plaster so it will absorb part of the moisture from the clay and cut the drying time. In molding the doll parts the mold is not lined with petroleum jelly because it might hinder the drawing effect of the plaster.
The mold needs to be clamped together. [ill. 4] Elsie uses a piece of innertube to fit around her mold; however there are bands sold for this purpose also.
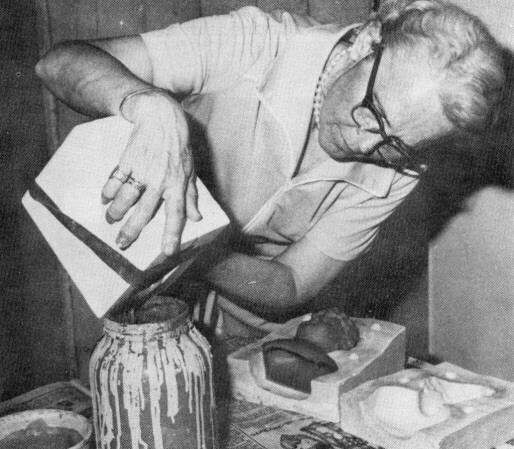
The clay should be stirred before pouring to mix all the materials thoroughly. Pour the clay in the mold slowly to prevent air bubbles forming and to fill in every indentation. Let the clay set for a few minutes or until a thin shell of about 3/8 inch begins to form. The time depends on the humidity and the temperature. The clay shell will be a darker grayish color. When the shell has formed the right thickness, pour the liquid clay from the center of the head in the mold back into the clay jar. Turn the mold upside down and let the excess clay drip out overnight. This is what makes the head hollow. Don't worry about spillage on the mold for it may be scraped away with a knife. Then remove the mold slowly to be sure the head is firm enough to handle.
It is now ready to be trimmed. [ill. 4] With a very sharp knife trim the shoulders and make holes in the doll's shoulders, if desired. Elsie said that many people like to use the holes to sew heads on the doll's body, but she doesn't make holes unless she knows the original had them. The scraps may be used for hand molding, but they should not be put back into the clay jar. The dried clay has lost some of the elements and is more highly concentrated than the liquid clay. If it is put back, the mixture proportions might be changed.
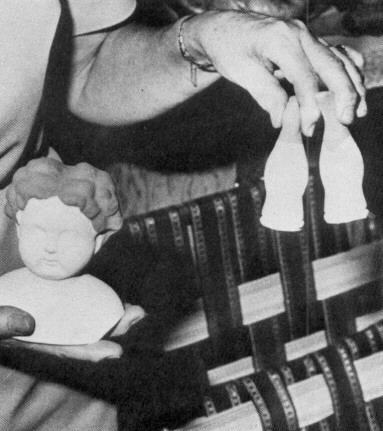
The head is now called greener. [ill. 5] Leave it in the mold overnight to dry more completely. After longer drying it has a harder texture and is called leather hard. The head can stand alone and is able to dry completely outside the mold. When the pieces are bone dry, they will be a light gray color and have a slightly grainy texture. The head is ready to be fired.
FIRING
The piece to be fired is placed in a Cold kiln on shelves that have had a kiln wash applied. This wash prevents the pieces from sticking to the shelves. Unless the kiln is automatic, barometric cones should be placed in the roUnd porcelain holder to help determine when the kiln is ready to turn off. The cones melt over when the correct temperature is reached. Since there are many different cones, it is important to buy the correct cone. The first temperature is 1800° to 1900° for about five hours. Elsie's kiln has a hole to watch the cone through.
ill. 5--The head when it comes from the mold is called greenware. It must dry overnight before it is fired.
Elsie Logan re-creates old-fashioned china head dolls in her studio in Montevallo.
[51]
When the pieces have cooled, paint on the features with underglaze paint and apply glaze over the head when the paint is dry. In the first firing, glaze is never used because it reacts with the newly formed piece and causes it to crumble. The glaze is a creamy substance like liquid glass and should be applied with a brush. The black glaze is used for the hair and shoes on the feet. Blond dolls must have china painted hair with the clear facial glaze applied over it. The black glaze will be a dull gray and the clear glaze will cover the features and be a dull white. [ill. 7] Fire for the second time at 1600" for 4 to 4-1/2 hours. After the second firing, the features will show through and the pieces will be shiny and smooth. If an air bubble forms in the glaze, sand it down, regales and fire it as before. The features should be painted over again with china paint to make them more distinct. Do not apply glaze this time. Fire again at 1200° for 2-1/2 to 3 hours. If the features still aren't dark enough, repeat the process. [ill. 8]
MAKING A BODY
The head, arms and legs are now ready to be attached to a body.
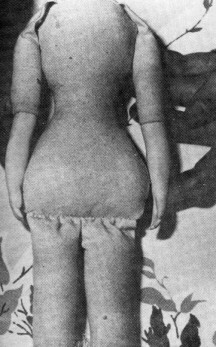
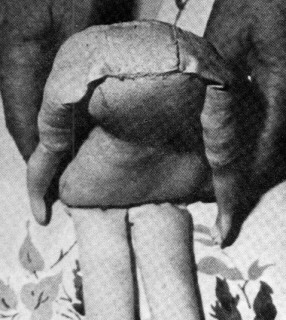
Elsie recommends using unbleached sheeting for making the body. Cut out the body pieces according to the pattern. Sew up the darts and then sew the two body pieces right sides together. [ill. 9] It may be necessary to ease the area around the hips. Stitch at least twice for extra strength, leaving the shoulder area open for a place to stuff the doll. Turn the body right side out and stuff it firmly with cotton or sawdust. Elsie has tried pillow stuffing and found that it doesn't pack firmly enough. The opening at the shoulder may be loosely basted now.
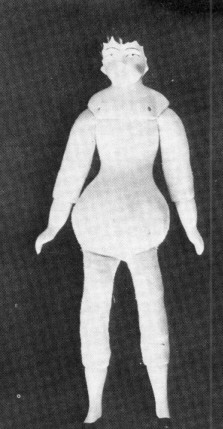
Sew each of the arms and legs up the sides, leaving both the bottom and top open. [ill. 10 & 11] Stitch these seams at least twice also. Don't turn right side out yet. Put the china hand or foot inside the cloth arm or leg with the raw edges of the bottom of the arm or leg even with the groove end of the hand or foot. Now gather the cloth to fit around the china piece. [ill. 12] Tie the cloth securely to the leg groove with a small wire or a heavy thread. Elsie also glues hers for added strength. Then if the wire or thread breaks, the glue holds. Turn the arms and legs right side out when the glue has dried. [ill. 13] Stuff the legs firmly within an inch of the top and stuff the arms within an inch and a half of the top. Fold the top of the leg under about half an inch and with a double thread whip the legs to the hip area of the body. [ill. 14] Turn the arm opening under about 1/8 inch and bring these over the shoulder area over the openings left for stuffing, adjusting the length so that the finger tips reach the bottom of the body. With a strong double thread whip the arms to the shoulders. [ill. 15]
ill. 7--The glaze goes on only after the pieces have been fired; otherwise they will crumble.
ill. 8--The dull finish of the glaze changes after the firing. Liquid glass is another name used for glaze because it has such a shiny finish.
[52]


ill. 12--Fasten leg or arm wrong side out to china foot or hand.

ill. 13--Then turn right side out.
ill. 14--After stuffing, whip legs to body with strong double thread.
ill. 15--Lap the arms over the shoulder opening. Fingers just touch the table.
[53]
ill. 16--Fasten the head with glue or sew to the body through holes in the head.
ill. 17--Pantalettes can be decorated with lace or eyelet.

ill. 18--The petticoat should cover the pantalettes and come above the feet.
photos on this page by Vickie Massy
Set the head on, either gluing it on, or if there are holes, sewing it on through these. The doll is now complete and only needs to be clothed. [ill. 16]
DRESSING THE DOLL
Dolls can be dressed in any manner limited only to your skill and imagination. The directions given here are for simple and basic pantalettes, petticoat and dress.
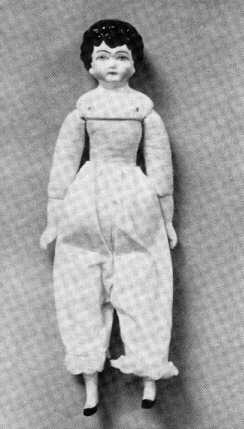
The first piece of clothing is the pantalettes. [ill. 17] After cutting them of white material, you may sew lace on the legs now or hem them later. Stitch the front and back centers together leaving the crotch open. Then pin the crotch together placing the front and back center seams together to form the leg openings. Stitch together. Elsie suggests making a casing across the top to fit the waist. She uses ribbon because that is what the first makers used, but elastic may be used also. Leave an opening in the back to insert the ribbon and to tie it.
The petticoat is simply a piece of fine white material cut to fit the bodice with ribbons attached for straps. The skirt is a piece of material gathered to fit the bodice piece. It is the width of the fabric you are using and long enough to reach from the doll's waist to the shooters, allowing for a hem. Elsie uses the bodice dress pattern and cuts hers of ungathered eyelet. The skirt of the petticoat may have lace added at the bottom or hemmed. The petticoat should be just above the foot so it won't show under the dress. It is fastened in the back by snaps or buttons and buttonholes. [ill. 18]

The dress can be very simple with the three basic parts, bodice, sleeves and skirt as above, or as fancy as one's imagination and skill allows.
[54]
The basic dress has three pieces--the bodice [ill. 20] the sleeve [ill. 21] and the skirt. The bodice and sleeve patterns are given. The skirt is a piece of material gathered like the petticoat and long enough to cover the doll's feet. It can be wider if you want a very gathered skirt. Any kind of material may be used. Some companies that specialize in doll patterns offer very elaborate patterns.
The shoulders of dolls vary, so it would be a good idea to cut the bodice and sleeves out of old material to check the fit before cutting the good material. Gather the sleeves to fit the armhole and sew in. Then sew up the side of the bodice and continue sewing up the sleeve. This way the bodice side and sleeve will be one continuous seam. Adjust the bodice to fit the doll allowing room for a fastener.
Gather the top of the skirt and fit it to the bodice, leaving an opening at the back. Seam the skirt up the back, leaving enough room to dress the doll. Sew onto the bodice. It should be long enough to cover the doll's feet when she is held by her head. Hem the skirt and turn down a self-facing on the neck.
All that the dress lacks is snaps or buttons. From this basic pattern you can add many frills and extras. Lace, collars, cuffs and overskirts can be sewn on the dress. You can make bonnets, sweaters, coats, purses--just let your imagination go. You now have something to pass on to the next little girl in your family.
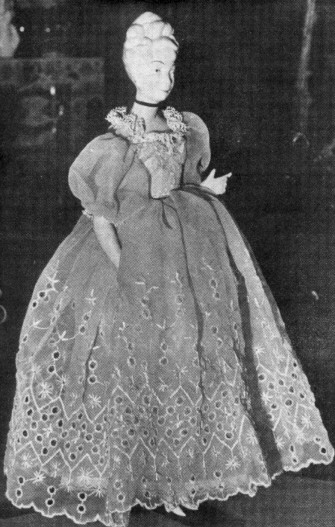
Madame Du Barry was only one of many character dolls made. She was the girlfriend of King Louis XV. When he died she was forced to leave France because she was hated so.
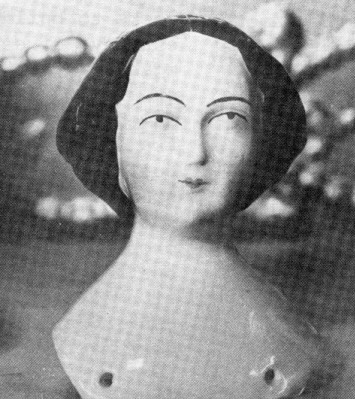
Jenny Lind, a well known Swedish actress was made into a character doll while she toured America. Though she had blond hair she often performed in a dark wig because she loved dark hair.

Bye-lo baby dolls were designed especially for children to play with. This doll is made of bisque.
[55]
Copyright © 1981 BITTERSWEET, INC.
Next Article | Table of Contents | Other Issues
